Showing posts with label feta. Show all posts

Thursday, 5 March 2015

Summer Vegetable Tarts

Even though it's now officially Autumn, there are still so many Summer vegetables around in the fruit and veg shops and markets. I know that our tomato plant is flourishing!

A light puff pastry tart is the perfect way to use up some of those vegetables in a fresh and easy way. Shop bought frozen puff pastry is just so easy to work with, and is great to have in the freezer to use for sweet and savoury treats, whenever the mood strikes you. As much as fresh pastry is delicious, as a working mum, I just don't have the time to make my own, especially puff pastry.


These tarts are perfect as a quick mid-week meal and would also be lovely as a light weekend lunch. Serve them with a salad or some roasted vegetables to make it a more substantial dinner.

The zucchini is only barely cooked, but because it is sliced so thinly, it is delicious. The creamy Danish feta adds saltiness and the roasted red capsicum sauce a beautiful sweetness.

I like making individual tarts, because they look much more pretty, but you could easily make this into one tart to serve at the table. For a dinner party, cut the pastry into nine or twelve squares to make canapés. Lovely to serve with a glass of Champagne at the beginning of the night!

 Whip these tarts up for your next lunch or dinner and see how quickly they disappear!


Summer Vegetable Tarts


2 red capsicums
1 Tbs olive oil
1 sheet frozen puff pastry, defrosted
80g Danish feta
2 spring onions, thinly sliced white and inner green part
A handful of mint leaves + extra to garnish, finely chopped
1 small zucchini
1 Tbs toasted pinenuts
Vegetables or salad to serve
Salt and pepper to taste


Preheat a grill to high heat.
Cut capsicums in half and remove seeds and membranes.
Place skin side up on a foil covered tray and grill until the skin is blackened and blistered.
Wrap the capsicum in the foil and set aside for 10 minutes for the skin to loosen. Peel the blackened skin off and discard.
Place roasted capsicum flesh and oil in a blender and whiz until smooth. Season to taste and set aside.

Preheat oven to 220 degrees.
Lay pastry sheet out on a work bench and cut into quarters. 
To make tarts, score the pastry completely around the outside, about 1cm in from the edge. Prick the centre with a fork. See the top tarts in the photo.
Alternatively, cut completely through the pastry 1cm in from the edge, except for 1cm at the two opposite corners. Fold the pastry strips across the square to create a decorative edge. Prick the centre with a fork. See the photo for the finished product.


Brush the outside of the pastry squares with milk and place on a tray lined with baking paper.

Par cook pastry cases for 10 minutes, or until puffed and golden. Use an oven mitt and a spoon to push down the centre of the pastry so that it is flat. Remove from the oven.


Using a vegetable peeler, cut long ribbons from the zucchini and set aside.
In a small bowl, mash feta with a fork until smooth. Add mint, spring onion and season with pepper. 
Spread the feta mixture into the pastry cases.


Top with zucchini ribbons and return to the oven for 5 minutes, or until the pastry is completely golden and the zucchini has softened.


Place blobs of the capsicum puree over the tarts and return to the oven for 1-2 minutes to warm through.
Carefully remove tarts from the baking tray onto serving plates. Sprinkle with toasted pinenuts and extra chopped mint.
Serve with vegetables or salad.

Enjoy!

Monday, 2 March 2015

Quinoa, Grape and Nectarine Salad

This weekend we went away with the family to celebrate my Father in Law's 60th birthday. My job was to bring a salad to eat at a BBQ lunch.

Not knowing exactly what cooking facilities I'd have available and wanting something that I could easily transport all the bits and pieces, I thought I'd look for a sturdy sort of salad. As I happened to be flicking through the latest Coles catalogue, I came across this recipe.


In true eat quaff laugh form, I modified it a little bit to suit my tastes, but it turned out to be an absolute winner! Everyone loved it and there was only a small bit left over, which is always a good sign.

I cooked the quinoa before we left home and just took it away with us in a container. The grapes I cooked in the morning and left to cool in the fridge, so that they wouldn't make the rest of the salad soggy. I didn't use up all the dressing on my salad, but you could use it all if you like a lot of dressing. Otherwise, keep it in the fridge for another time.

This was a great BBQ salad, but would be perfect to take anywhere you need to bring a share plate. The flavours were very summery, so if you're going to make it, you'll need to do it soon while nectarines are still in season. The white nectarine gave it a beautiful floral sweetness. Yellow nectarines would probably be quite nice too, but try to hunt out the white ones if you can.

To make this salad into a bit more of a meal, toss through some cooked chicken or flaked salmon for a protein hit.

Delicious!


Quinoa, Grape And Nectarine Salad


1/4 cup extra virgin olive oil
1/4 cup white wine vinegar
1 cup quinoa
3 cups red grapes, removed from stems
1/4 cup marsala
4 spring onions, washed and root end removed, thinly sliced white and inner green part
100g rocket
2 white nectarines, seeds removed and thinly sliced
80g Danish feta, chopped
1/4 cup toasted pinenuts
1/4 cup toasted macadamia nuts, chopped
Salt and pepper to taste

Combine oil and vinegar in a jar and season to taste. This is your dressing.
Bring a medium sized saucepan of water to the boil. Add quinoa and simmer for about 10 minutes, or until it is cooked. Remove from the heat and drain well. Set aside to cool.
Heat a drizzle of oil in a large frypan over medium heat. Add the grapes and toss for about 3 minutes, or until they start to soften.
Add the marsala to the hot pan and toss around to coat the grapes. Continue to cook for another 2-3 minutes, or until the marsala has evaporated, but the mixture isn't too dry. Tip the grapes into a bowl and set aside to cool.

In a large bowl, combine the quinoa, spring onions, rocket, grapes, feta, pinenuts and macadamias. Toss through half the dressing.
Add the nectarines and fold through carefully so they don't break up.
Season to taste and add a little bit more dressing if you think it needs it.

Enjoy!


Friday, 12 December 2014

Salami, Feta And Tomato Pasta

As it gets closer to the crazy Christmas end of the year, I'm finding that there just isn't enough time to do everything that I need to do. Even trying to find the time to sit down and write up recipes for the blog is getting difficult.

This pasta from the other night was so easy to make and probably took less time to make than to write up! The combination of crispy salami, salty feta, sweet tomatoes and spicy rocket was beautiful.


Not just around Christmas, but any time of year, I like to try to use up what's in the fridge at least once a week, so that I don't have stuff sitting around for ages. It's a great way to stop food wastage and can lead to some interesting experiments!

This pasta was light and tasty and helped to clean out the fridge. If you wanted to add a few extra ingredients to make it a bit more fancy you could, but at this time of year when there is so much rich food on offer, as simple dish is always a good idea.

Salami, Feta And Tomato Pasta

250g short pasta
100g salami, thickly sliced into circles and then halved
2 tomatoes, diced
A few big handfuls of rocket
A handful of mint leaves, finely chopped
Juice of half a lemon
100g Danish feta, diced
Salt and pepper to taste

Cook pasta as per packet directions and drain, reserving about a cup of the pasta cooking water. Set aside.
In the same saucepan, fry salami pieces until they release their fat and become crispy.
Toss the cooked pasta through the salami fat to coat.
Over a medium heat, add tomato, rocket, mint and lemon juice and toss to combine and to wilt the rocket.


Season to taste and add some of the pasta water if it seems too dry.
At the last minute, stir through the creamy feta until it melts and creates a sauce.

Serve in bowls with extra feta and rocket on top, if you like.

Enjoy!


Thursday, 4 December 2014

Green Filo Pie

With all the Christmas parties, feasting and drinking that are going on at this time of year, sometimes it's nice to have a simple dinner at home with lots of green vegies. This pie is the perfect dish.

It really is easy to make and you can prepare it in the morning, or even the day before, and then just pop it in the oven when you're ready to eat.

It's fantastic hot, straight out of the oven, when the filo pastry is all crispy, but it's also nice to have cold. Perfect to take on a picnic or for lunch the next day.

I used cavalo nero and kale for my greens, because the fruit shop had them on the clearance table, but you could use spinach, silverbeet, chard or any anything else that takes your fancy. Feel free to use whatever herbs you have on hand too. Dill, basil, parsley, coriander, oregano.......they are all lovely.

I've made this pie lots of times before, but never thought to put the filling mixture in the food processor to combine it. Normally I stir everything together in a big bowl, which leaves separate chunks of ricotta and spinach. It's so much easier to whiz it all up and have a lovely green pie with a much smoother texture. I'll definitely be doing this again next time.

The Greeks may not approve of my version of cheese and spinach pie, but I think it's pretty tasty!


Green Filo Pie


2 bunches of greens
300g fresh ricotta cheese
130g feta cheese, chopped
4 eggs
A handful each of parsley and mint leaves
1/4 cup sour cream or creme fraiche
40g Parmesan cheese, coarsely grated
Pepper to taste
1/4 tsp ground nutmeg
2 cloves of garlic, chopped
1 small onion, diced
375g packet of filo pastry, at room temperature

Wash the greens and trim the woody stems and veins from the leaves and coarsely chop.
Blanch in boiling water for 30 seconds, or until wilted.
Remove from the water and drain well in a colander. Squeeze to remove as much water as possible.
Set aside to cool.
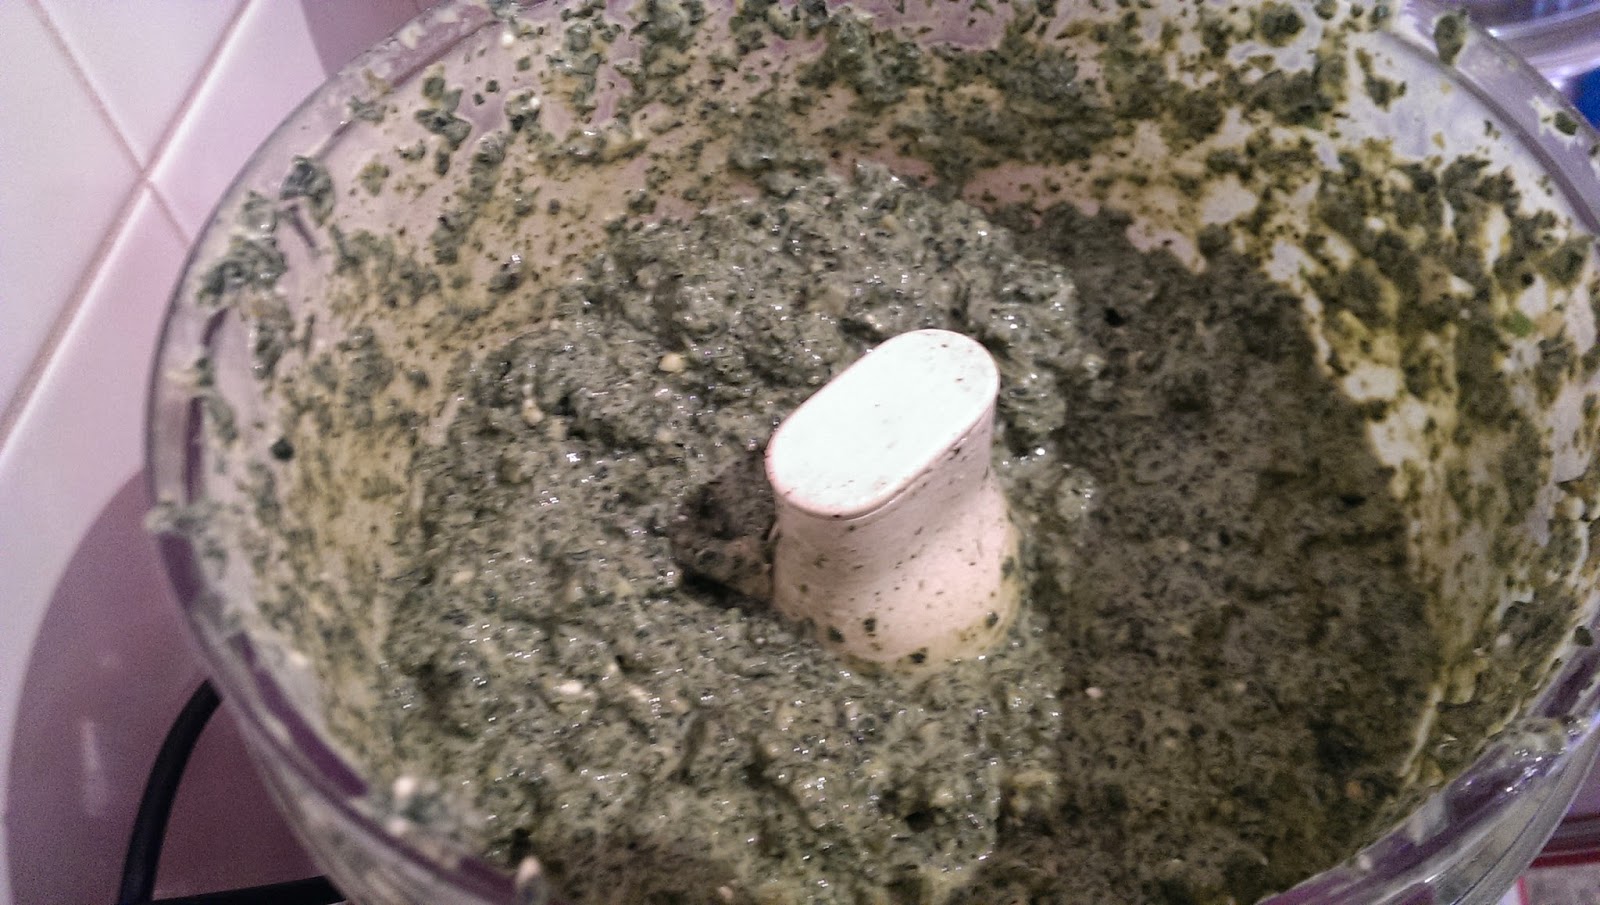
In a food processor, combine all the ingredients except the filo pastry. Whiz to combine and until it's a lovely green colour and quite smooth. Season to taste with pepper. You shouldn't need much salt as the parmesan and feta are salty.


Preheat oven to 180 degrees.
Lightly grease a large baking dish with oil spray.
Layer dish with sheets of filo, spraying lightly between each sheet with a little of the oil spray. I needed to overlap the sheets to cover the base of my tray and allow enough overhand to fold over the top of the pie. You want about 5 layers of pastry to make a sturdy base.
Fill the case with all of the spinach mixture and spread evenly in the dish.


Take one piece of filo pastry and fold into thirds. Place in the centre of the pie and then fold the edges in to create a parcel.
Lightly spray the top with oil spray.


Bake in the oven for 45 minutes, or until the top is golden and the filo pastry crispy.
Remove from the oven and allow to sit for 5 minutes before serving.


To serve, cut into large wedges and serve with a simple salad and your favourite tomato chutney.

Enjoy!

Tuesday, 11 November 2014

Asparagus, Broad Bean and Feta Tart

I love buying and cooking with what's in season. Fruit and vegetables that are at their peak locally are not just cheaper, but they are also so much more flavoursome than when they are grown in a greenhouse somewhere or imported from overseas. It's also nice to know that I'm supporting the local farmers and greengrocers.

Asparagus is just lovely at the moment and whenever I see it at the greengrocer, I can't help but buy a bunch or two. It's so versatile and I could really eat it every day. Simply blanched and drizzled with oil, smothered in Hollandaise, dipped into runny boiled eggs or baked into tarts and quiches. Delicious!

For this weeks vegetarian dinner, I decided to make a tart. I had some broad beans in the freezer and a piece of feta in the fridge that needed using up. I used frozen pastry, because I'm lazy, but freshly made shortcrust would be so much nicer. If only I had more time in my day to make pastry from scratch!

This tart was really easy to put together and I served it with a light, roasted cherry tomato, baby spinach and rocket salad. On a sunny evening, it was a lovely light dinner. It would also be beautiful for a relaxed weekend lunch or picnic, sitting outside in the sun with a glass of wine and good friends.


Asparagus And Broad Bean Tart


1 sheet of frozen shortcrust pastry
A bunch of asparagus, woody ends snapped off
100g frozen broad beans
1 egg
50g Danish or creamy feta, chopped
A handful of mint leaves, finely chopped
6 Cherry tomatoes, halved
A couple of handfuls of baby spinach and rocket
A drizzle of balsamic vinegar
1 tsp toasted sunflower seeds or pinenuts
A drizzle of extra virgin olive oil
Salt and pepper to taste

Preheat oven to 200 degrees.
Take pastry out of the freezer and allow it to defrost.
Place on a lightly greased oven tray, score a line 1cm from the edge all around the outside.
Par bake for 5 minutes or until the pastry very lightly browns and puffs. Remove from the oven and set aside.

Place asparagus spears and broad beans in a heatproof container and pour over boiling water. Allow to sit for 5 minutes, then drain.
Remove skins from broad beans and set aside with asparagus spears.


In a bowl, combine egg, feta, mint and pepper to taste. Mix well to make it into a creamy paste with a few lumpy pieces of feta.
Spread this mixture onto the pastry sheet, keeping it within the border.
Arrange the asparagus and broad beans over the filling.
Return to the oven and bake for about 20 minutes, or until the pasty is golden and the egg and feta mixture is set.


While the tart is cooking, place cherry tomato halves and a good drizzle of balsamic vinegar in a tray and roast for 10 minutes or until the tomatoes are soft.
Remove from the oven and allow to cool.
Combine the rocket and baby spinach with the tomatoes. Sprinkle with seeds and add a drizzle of extra virgin olive oil and balsamic to create a dressing. The tomatoes will break down to create a dressing of sorts too, so don't add too much. Season to taste.


Serve the tart in large pieces with the salad on the side.

Enjoy!


And To Drink....


I have written about the 2007 Nepenthe Ithaca Chardonnay quite a few times before. When we bought it, we got a dozen, so there have been plenty of bottles to enjoy!

This is a gorgeous cool climate Chardonnay with lovely citrus and stone fruit flavours. There is a nice nuttiness from the oak, but it isn't overpowering.


With a light vegetarian dish, you don't want a wine that overpowers the subtle flavours of the food. This Adelaide Hills Chardonnay was perfect. It wasn't too heavy and the sweetness of the broad beans and asparagus matched beautifully with the fruit flavours in the wine. The saltiness of the feta wasn't too strong, so it still complemented the wine well.

As a wine to match with this weeks Meat-free Monday, the Nepenthe Chardonnay was wonderful!


Tuesday, 28 October 2014

Chargrilled Eggplant And Zucchini Salad

After a long weekend away in Tasmania, eating and drinking lots of delicious things, I was in desperate need of some simple vegetables!

As much as I love to eat out and enjoy new and different food, nothing beats a simple homemade meal.

With a few vegies left in the fridge before we headed away, I knew that they needed to be made into something before they would be wasted. This salad is the result of using up leftovers, and I must admit that it was pretty tasty.

The creamy Danish feta combined with the oil and lemon juice to make a lovely dressing on the vegetables. Being chargrilled first, the zucchini and eggplant were nice and soft, but still with a little bit of bite. You could also roast some red capsicum and add that to the salad for extra sweetness.


I served my salad so that the vegetables were still warm. I think the flavour in the eggplant and zucchini are much nicer when they aren't too cold. If you were preparing the vegetables earlier in the day, either take them out of the fridge an hour or so before serving to warm up, or give them a short burst in the microwave to heat them up.

Toasted almonds would also be perfect in this salad, if you didn't have any pinenuts. You just want something to add a little bit of toasty crunchiness.

Enjoy this salad on it's own or with some beautiful fresh crusty bread and butter.


Chargrilled Eggplant And Zucchini Salad


1 eggplant
1 zucchini
3 spring onions, trimmed and white and inner green parts cut into thin rounds
2 tsp toasted pinenuts, plus extra to serve
50g Danish feta, diced
A handful each of baby spinach and rocket
A sprig of parlsey, leaves coarsely chopped
1 Tbs lemon juice
2 Tbs extra virgin olive oil
Salt and pepper to taste

Slice eggplant and zucchini lengthways into 5mm thin slices.
Spray with an oil spray and season lightly with salt and pepper.
Heat a grill pan over medium heat and grill vegies for 2-3 minutes each side or until grill marks form and the vegetables are soft. The eggplant will need a little bit longer to soften.
Remove from the pan and allow to cool slightly.
Thinly slice each piece of eggplant or zucchini into long strips. You should get about 4 strips from the zucchini and 5 or 6 from the eggplant.
Put the eggplant and zucchini strips in a bowl with the spring onions, pinenuts, rocket, baby spinach, parsley and feta.
In a small jar, combine the extra virgin olive oil and lemon juice. Season the taste and shake to combine.
Pour about half of the dressing over the salad and toss well to combine. The feta should 'melt' and make a creamy dressing. Season to taste.

Serve the salad piled on to plates, topped with a few extra toasted pinenuts.

Enjoy!


Tuesday, 7 October 2014

Carrot And Feta Fritters

Over the past few weeks I've seen recipes for fritters popping up all over the internet. It must be a sign!

I've always loved making zucchini fritters and corn fritters are wonderful for breakfast, lunch or dinner! Add a runny poached egg and crispy bacon for a weekend brunch or a herb yoghurt and flatbread or wraps for a light dinner. They really are so versatile.

These carrot and feta fritters were inspired by my fridge contents. I had a bag of carrots, a wedge of creamy Danish feta and a few eggs that needed using up. The coriander in the garden was starting to bolt and so I wanted to use it up too. The end result were these tasty fritters. I served them with chilli coriander yoghurt, a cos lettuce, tomato and capsicum salad and mountain bread. We made them into wraps and gobbled them up in no time. Even the kids loved them, minus the chilli. It's always great when everyone enjoys the same meal.


If you don't like chilli, or are serving this to little ones, just leave out the chilli in the yoghurt. It really is just to taste, so you can add a little or a lot, depending on how hot you like it.

If you have any leftovers, fritters are great reheated for lunch the next day.


Carrot And Feta Fritters With Chilli Coriander Yoghurt


1 large carrot, grated
1/2 cup coriander, finely chopped
2 eggs, lightly beaten
1 clove of garlic, finely chopped
1 shallot, finely chopped
1/4 cup plain flour
1/4 cup milk
1/2 cup Danish feta, diced
Pepper
A drizzle of oil for frying

1/2 cup natural yoghurt
A pinch of chilli flakes (or to taste)
1 Tbs coriander, finely chopped

In a large bowl, combine the carrot, coriander, eggs, garlic, shallot, flour, milk and feta. Season to taste with pepper. There is enough salt in the feta, so you shouldn't need to add any more.
Heat a drizzle of oil in a frying pan over medium heat. Fry 3-4 fritters at a time, depending on the size of your pan. About 1/4 cup mixture makes a good sized fritter.
Fry for 1-2 minutes each side or until golden brown. Flip and cook on the other side.
Remove from pan to a plate and keep warm. Repeat with the remaining mixture.

In a separate bowl, combine the yoghurt, chilli and coriander.

Serve the fritters with the yoghurt and salad and wraps, if you like.

Enjoy!


Thursday, 18 September 2014

Fancy Chicken And Salad

As well as being the first birthday of eat quaff laugh this week, I've also had my parents over to stay, so it's been a great chance to cook up some nice meals and open some lovely wines.

I picked up the recipe for last night's dinner years ago, and I've finally got around to making it.

The vincotto and orange glaze on the chicken was beautiful - slightly sweet, but with a hint of bitterness as well. Served with the rocket, feta, red grape and caramelised walnut salad, it was just delicious. I ended up only needed a very small amount of the glaze, so you could either make half the recipe, or put it in the fridge to use another time.

I think this recipe is definitely going to become my go-to dinner in summer. While the walnuts do take a bit more time to prepare, you can make them in advance. I didn't use up all of mine in the salad, as I thought it might make it too sweet, so now I have leftovers to make a fancy dessert. Never a bad thing!


For a more interesting salad to take to a BBQ or gathering, make the salad by itself, without the chicken. Much more interesting than potato salad or coleslaw. Instead of chicken, you could always use lamb or pork. Crispy skinned duck fillets would be fantastic too.

With the warmer weather on the way, now is the perfect time to try this for a weekend lunch or dinner.


Vincotto Chicken With Rocket, Grape and Caramelised Walnut Salad


Caramelised Walnuts
100g walnuts
1/2 cup caster sugar
1/4 cup water

Cover a baking tray with a sheet of baking paper.
Combine sugar and water in a small saucepan.
Stir over low heat until the sugar has dissolved, then simmer over medium heat without stirring.
Watch the mixture carefully as it can easily turn from clear to burnt in the blink of an eye!
Remove from the heat when it turns golden brown, add the walnuts and stir to coat in the caramel.
Quickly pour the walnuts and caramel onto the baking tray and spread out into a single layer.
Allow to cool, then break into small pieces.


Glaze
1/2 cup vincotto
1/2 cup fresh orange juice
1 1/2 Tbs honey
1 galric clove, finely chopped
1 tsp soy sauce (or to taste)

Combine all the ingredients in a small saucepan over low heat.
Stir until the honey dissolves, then increase the heat and simmer for about 1 minute.
Taste and add extra soy sauce, if needed.


Dressing
1 Tbs extra virgin olive oil
1/2 Tbs verjuice or white wine vinegar
1 tsp Dijon mustard
Salt and pepper to taste

Combine all the ingredients in a small jar and shake to combine.


4 chicken breasts
3 cups of rocket leaves
1 medium bunch of red grapes, stems removed
100g soft feta (Danish is perfect), diced

Preheat oven to 180 degrees.
Using a meat mallet, beat the chicken into roughly 1 1/2cm thick pieces.
Place chicken on a baking tray and brush liberally with the glaze. Turn and brush the other side.
Bake in the oven for 20-25 minutes, or until the chicken is cooked through.
During cooking, brush with the glaze another couple of times.

In a large bowl, combine rocket, grapes and feta.
Gently toss to combine with the dressing.

To serve, place salad on the plates, top with a handful of walnuts and one piece of chicken.

Enjoy!


And To Drink....


Last night we were a bit greedy and decided to open two bottles of wine. A bit fancy on a school night,  I know!

Mum and Dad live interstate, so I don't get the chance to see them very often, so opening good wine when they visit makes perfect sense. Champagne is obligatory for family dinners and what better bottle to open than a Champagne Jacquesson Cuvee no 735. This wine was based on fruit from 2007, so had a few years of extra complexity to it.

This Champagne was delicious! Yeasty and toasty with some acidity and lemony flavours. It wasn't overly heavy and was the perfect aperitif to have with some cheese before dinner. 

I could certainly drink a lot of this Champagne!


The second bottle we opened was a Turkey Flat limited release 5 month skin contact Roussanne. This wine was only released to the public last week and I managed to snap up three bottles, which were delivered yesterday. The fruit came from the Barossa Valley in South Australia.

Having 5 months skin contact, made this a lovely golden colour with beautiful stone fruit, honey and quince characteristics. There was still some acidity, but the overwhelming flavour was of being in an orchard at spring time. The sweetness perfectly complemented the glaze on the chicken, the caramelised walnuts and the salty feta.

This was a wonderful wine combination, that I hadn't even planned. I'm so glad I have another two bottles left to experiment with on another occasion.


Thursday, 9 January 2014

Lamb And Sangria

Finally the weather here in Melbourne has decided to warm up. Yay! But what to do with the half empty bottle of red wine that we opened last night when it was still cool? It's too hot to have red wine with the lamb dish I'd planned tonight. The answer is sangria!

We actually drink quite a lot of sangria, well my version of it at least, and it's a great way to make a refreshing drink out of a bottle of red wine. I have also made a couple of versions using white wine too. Rather than adding citrus and strawberries, peaches and apricots tend to work much better with the stone fruit flavours in a lot of white wines.

Tonights version is really just a combination of what's in the cupboard and fridge. You can almost add anything you like, as long as the flavours are complimentary. Mint work really well too, but I didn't have any in the garden. As well as strawberries, you could also use orange slices or pieces, cherries or grapes. I marinated my strawberries in some brandy for a bit of extra oomph, but if you want the sangria to be less alcoholic, then just leave it out.


Obviously, if you were making this recipe for a party, you'd probably need to double everything and use a whole bottle of vino. Add more or less fruit and soft drink depending on your tastes and how sweet you prefer your sangria. Instead of lemonade, you could use soda or even dry ginger.


Simple Sangria


1/2 a bottle of red wine, chilled
30ml brandy
6 strawberries sliced
100ml sparkling cranberry juice
1 1/2 cups lemonade
Ice 

Place the strawberries and brandy in a small bowl and allow to marinate for a few hours in the fridge.
When ready to serve, combine wine, soaked strawberries with the brandy, juice, lemonade and ice to taste.
Give a gentle mix and serve.


Lamb, Feta and Watermelon Salad

I love the combination of watermelon and feta as a summer salad, so why not make it into a meal by adding some lamb. Perfect on a hot summer's day when you want something light and easy to prepare. To add a bit of extra texture to this salad, I've also used some Israeli couscous. These little balls of goodness taste great and soak up the lemony dressing to become flavour bombs. Combined with the sweetness of the watermelon, the saltiness of the feta and the beautiful lamb, this dinner will become a regular on our table.

I coated my lamb in a Rich Glen Pistachio and wasabi pea dukkah that I received for Christmas. It has a little bit of heat from the wasabi peas, but wasn't overpowering. It was amazing! Next I want to just have it with oil and fresh bread for dipping.

Combined with a sweet, chilled sangria, could life get any better!!


1 or 2 pieces of lamb backstrap, depending on size and your hunger
A drizzle of olive oil
3/4 cup Isreali couscous
3 slices of watermelon, cut into small pieces
1/4 cup dukkah
Juice of 1 lemon
1 Tbs pomegranate molasses
100g marinated feta, oil reserved
2 spring onions, thinly sliced
1 cup rocket leaves

Bring a saucepan of water to the boil and add couscous. Stir gently, then boil until cooked. This will take about 10 minutes. You want the balls to be soft, but to still have a bit of bite.
Drain, rinse and cool.
Sprinkle dukkah on a plate and press the lamb into it so that it is covered on all sides. You may need a little more or a little less, depending on the size of your lamb.
Heat a drizzle of oil in a frypan and fry the lamb on both sides until cooked to your liking. It is best served when it's still a little pink on the inside. Don't have the heat too high or the dukkah will burn.
Leave the meat to rest while you prepare the salad.
In a small bowl, combine lemon juice, pomegranate molasses and about a tablespoon of the reserved feta oil. Whisk until combined and season to taste. Add more oil if you think it is needed.
Place couscous in a larger bowl and add the dressing. Stir to coat the balls well.
Gently stir through watermelon, feta and rocket.
Pile the salads on to plates and top with thickly sliced pieces of the lamb.


Thursday, 28 November 2013

November Wine Club - Kangarilla Road Cabernet Sauvignon

I told you about The Fabulous Ladies Wine Society last month when I wrote about their online wine club I was taking part in. One of the wines for November is the 2011 Kangarilla Road Cabernet Sauvignon.  To match this beautiful wine, I decided to make a delicious meal to go with it. Roasted eye fillet with a beetroot and vincotto salad was on the menu!


Kangarilla Road is a McLaren Vale winery established in 1997. Located less than an hour out of Adelaide, in South Australia, their cellar door is easy to pop in to. They use biodynamic and organic winemaking styles, using grapes from their 30 acre property in the rolling hills of the McLaren Ranges. Having a Meditteranean climate they tend to make full flavoured red wines with a couple of whites and a rose too.

I was lucky enough to visit Kangarilla Road a couple of years ago and managed to try one or two (or three or four...) of their wines. I loved the Zinfandel and Sangiovese. If you ever happen to be in the area, they are definitely worth a visit.


The 2011 Cabernet Sauvignon was a delight. Being quite a young wine, I expected it to be a bit rough around the edges and heavy with tannin, but it was exactly the opposite. It was very smooth with dark plum and berry flavours and a touch of vanilla from the French oak barrels. It also had quite an earthy taste to it, which perfectly matched the earthiness and sweetness of the beetroot. The crunchy, roasted macadamias had a great texture and also brought out the vanilla and spice. Matched with the roasted eye fillet as well as the salad, the wine was given much more depth of flavour.

While this wine was perfect with the steak and salad, it would also have been wonderful to drink on it's own or with a cheese platter with some dried fruit and nuts. Maybe next time we'll just have a bottle on a Sunday afternoon with some nibbles!


Beetroot And Vincotto Salad 


2 large beetroots, stalks trimmed
1/4 cup macadamia nuts, halved
A large handful of rocket leaves, chopped into large pieces
80g Danish feta, cut into small pieces
1 Tbs vincotto
1 Tbs extra virgin olive oil
Ground black pepper


Preheat oven to 180 degrees.
Peel beetroots and cut into large pieces.
Place on a baking tray, spray with oil spray and toss to coat.
Roast for approx 30 mins or until cooked. This time will depend on how big your pieces are.
Remove the beetroot from the oven and cool to room temperature.
While the beetroots are roasting, place macadamias on a small baking tray and roast for about 5 minutes or until starting to brown. Keep an eye on them as they burn very quickly.
Remove from the oven and cool to room temperature.
When ready to serve, toss beetroot, rocket, nuts and feta with combined extra virgin olive oil and vincotto. Season with freshly ground black pepper to taste.


Roasted Eye Fillet


500g eye fillet, all in one piece
Salt and pepper to season
Olive oil

Preheat oven to 180 degrees.
Trim any sinew from the beef so that you have a nice even cut of meat.
Season all over with salt and pepper.
Heat a good drizzle of oil in a frying pan on high heat.
Sear the beef on all side for a minute or so, until browned evenly.
Transfer the beef to a baking tray and roast for 15 mins, or until cooked to your liking. 15 mins will give you medium rare, which is how we like it.
Allow the meat to rest in a warm place, covered with foil, for 10 minutes before you carve it, otherwise you'll loose all the wonderful juices.
Carve meat into two large pieces and serve with the salad and mustard or chutney of your choice.


Monday, 18 November 2013

Stuffed Mushrooms a Winner!

There has been some serious eating and drinking going on in the eat quaff laugh household recently and it doesn't look like settling down any time soon!  A charity dinner tomorrow night, a dinner party on Saturday, plus another one next week, it's going to be a busy lead up to Christmas.

After a weekend away to celebrate my nephews first birthday, catching up with family and friends who I haven't seen in a while, eating and drinking lots of fancy meals, it's time for something a bit healthier.

After being exhausted following the busy weekend and flying solo with the kids, I knew that something simple was going to be needed for dinner. I had a few bits and pieces left over in the fridge, but after a quick dash to the shops, decided a vego meal was in order.


Stuffed mushrooms are such an easy meal, whether it be for lunch or dinner, and you can more or less fill them with anything you like. It's a great way to use up those little bits and pieces that are in the fridge or cupboard as you want the flavours to all meld together to create something yummy.

I picked up a couple of big swiss brown mushrooms and some sweet corn that was on special from the fruit and veg shop to create the base for this meal. With some stale bread, a piece of feta, tomatoes and fresh herbs, I quickly whipped up something delicious. Even though this was a last minute meal, it will become a regular in our house, especially when we need a night off from heavy, rich food.


To go with the mushies, I wanted a nice fresh salad, and that's where the corn came into it. I love the combination of corn and feta and have made this salad many times before. What made tonight's version a little bit more special was the dressing. Given to me by my Mother in Law after a trip to Tasmania, this Ashbolt dressing was divine.  Made with extra virgin olive oil, elderflower concentrate, vinegar and mustard, it was a little bit different to your standard dressing. With a bit of sweetness and a bit of acidity, it was the perfect match to the sweet corn. Definitely one worth looking out for, as it was beautiful!


Stuffed Mushrooms

2 large swiss brown or portabello mushrooms
1 slice of slightly stale bread, cut into small cubes
1 clove of garlic, finely chopped
2 tomatoes, diced
A handful of baby spinach leaves, chopped
Salt and pepper to taste
A drizzle of extra virgin olive oil


Preheat oven to 180 degrees.
Prepare the mushrooms by cutting away the stalk at the base to make a nice cup for holding the filling.
Place mushrooms on a lightly greased oven tray and drizzle with a little oil.
Bake in the oven for 10 minutes, or until beginning to soften and release their juices.
While the mushies are cooking, prepare the filling.


Finely chop the mushroom stalks and combine in a bowl with the chopped bread, tomatoes, garlic, spinach and a drizzle of oil. Season with salt and pepper.
Take the mushrooms out of the oven and carefully pile the filling into them. Return to the oven and bake for about 10 minutes or until the mushrooms are soft and the bread cubes are crusty.
Serve with the corn and feta salad.

Corn And Feta Salad


4 cobs of corn, husk and silks removed
100g feta, cut into cubes
A handful of fresh parsley, chopped
Salt and Pepper to taste
Ashbolt salad dressing, or dressing of your choice

Wash corn cobs to remove any grit and remaining silks, then boil in a saucepan of salted water for about 4 minutes, or until the kernels are plumped and soft.
Drain and allow to cool.
When cool enough to handle, cut the kernels off the cobs using a sharp knife.
Place the kernals in a bowl with the chopped feta and parsley, and combine.
Dress the salad with your favourite dressing and serve.

Monday, 11 November 2013

Just Stuff It!!


We've had a few big and fancy dinners over the last couple of weeks and have probably drunk too much over the Spring Racing Carnival, so it's time to settle down and have something simple and slightly healthier.

Just because something is simple and healthy, doesn't mean that it has to taste bland and boring! We try to do a vego meal at least once a week, so I thought that tonight would be perfect for that. After a great lamb Rogan Josh and roast pork with crispy crackling on the weekend, something lighter was definitely in order! Thanks to my beautiful husband for his weekend cooking adventures when I was at a course for the two days.


I have made stuffed capsicums in the past and shared one of my recipes with you a while ago. On that occasion, I stuffed them with a mixture of goat mince, onion, garlic and herbs. This time, to make a vegetarian version, I've stuffed them with chickpeas, feta, onion, garlic, spinach and fresh oregano.  The filling has enough substance to make them hearty, without being too dense. When roasted, the capsicums give off their beautiful sweetness and the juices mix in with the filling.


Top it all with a blob of Greek yoghurt, a sprinkling of sumac and a light salad, and you have the perfect dinner. I decided to go with rocket, roasted tomato and toasted pinenut. Other roasted vegies that you cook at the same time would be perfect too. You could also make this as a weekend lunch when you don't want anything too difficult or heavy. 


I chose medium sized red capsicums, but depending on how hungry you are, you could choose larger ones. If you wanted, you could even use the little baby ones in red, yellow or green to make pretty appetisers for a party. With Christmas coming up, the colour scheme would be perfect for a festive get together!

Depending on the size of your capsicums, you'll probably have some of the filling left over. Heat it up in a pan or the microwave and serve it with a dollop of yoghurt and some fresh crusty bread for lunch.

Vegetarian Stuffed Roasted Capsicums

2 medium red capsicums
1 onion, finely chopped
1 clove of garlic, finely chopped
A handful of fresh oregano, chopped
A handful of fresh spinach, chopped
400g tin of chickpeas, drained and rinsed
1/2 tsp sumac, plus extra for sprinkling
100g feta, chopped
Salt and pepper to taste
Olive oil spray
Greek yoghurt and salad to serve

Pre-heat oven to 180 degrees.
To prepare the capsicum, cut the tops off them so you have a base with a lid. Remove the membrane and seeds from the inside.


Heat a drizzle of olive oil in a frying pan and gently cook the onion until starting to soften.
Add the garlic for another minute until it becomes fragrant.
Remove the pan from the heat and stir through the chickpeas, oregano, spinach, feta, sumac and salt and pepper to taste. Remember that the feta is salty, so you might not need much salt.
Fill the capsicums with the chickpea mixture until it reaches the top. Pack it in so it's quite firmly filled as it will shrink down during cooking.
Place the capsicums and lids on a baking tray and spray with the oil spray.
Bake for about 30 mins, or until the capsicums are softened and slightly charred. You might need to take the lids out of the oven before the bases to stop them burning.

To serve, place a capsicum on a plate, dollop Greek yoghurt on the top, sprinkle with sumac and replace the lid.
Serve with a simple salad.

Friday, 1 November 2013

A Fabulous Dinner

I've recently started following a website called The Fabulous Ladies' Wine Society. They are a wonderful group of women trying to get more females interested in drinking and learning about wine in a fun way. They hold events, give tasting notes on wines and support females in the Australian wine industry. As part of their website, they also have an online wine club. No forced buying of wines each month at all! This fabulous wine club lists two wines per month for you to try and then rate using their tasting cards. The wines are easily available at regular bottle shops and are not expensive.

This month they have a red and a white and tonight I've made a fancy meal to match with the white. It's a Taltarni Fume Blanc, which is actually the Sauvignon Blanc grape variety, but made in a very different style to the New Zealand type. I'm not such a fan of NZ Sauv Blanc, so am really looking forward to trying this one.

After lots of research in to the flavour of the wine, I've decided on a warm beetroot salad with feta and pan-fried scallops. I'm hoping that this will match perfectly.


Beetroot is another of my favourite vegetables and we tend to eat it quite a bit, especially once the plants in the garden have grown and we have beets on hand. They have such a rich, earthy sweetness, which I love. I grew up with tinned sliced beetroot, which I did love with cheese in a sandwich, but fresh is a world apart!

When you are preparing the beetroot, be aware that the colour will stain your hands and your clothes, so it's best to wear an apron and disposable gloves.

Feta brings a nice tartness and creaminess to the salad and the scallops some sweetness too. As is my preference, go for the creamy Danish feta, rather than the Greek style. I tend to find this much too dry and salty.

If you've never cooked scallops before, don't stress too much. The orange roe on the outside can be eaten, but it's a matter of personal preference. I don't like the taste or texture, but others do. It's up to you whether you want to keep it on, or cut it off. I prefer to cut it off, for a sweeter and cleaner taste.

This would also be the perfect party dish. Served in Asian soup spoons, a dollop of beetroot and feta with a scallop on top would be a great appetiser.

And To Drink...


The 2010 Taltarni Fume Blanc was like no Sauvignon Blanc I have ever tried before. Being a couple of years old, it may not have been as fresh as it could have been, but it was still amazing. Full of passionfruit and stone fruits, with some gentle oakiness, it was perfect drinking.

This was definitely my sort of wine. There was still plenty of that fruitiness that you want in a wine, but it wasn't overpowering in any way. The oak also didn't overpower, as sometimes it can.  If you like a lightly oaked Chardonnay, then you'd love this one!

The sweetness of the beetroot and the scallops matched wonderfully with the fruit and acid in the wine, with the creamy feta adding some tartness. The handful of rocket added some extra pepperiness.

Thanks to The Fabulous Ladies, I've found another wine that I'll be drinking again and again. Next time I might look for a current vintage to compare with.


Warm Beetroot and Feta Salad with Pan-fried Scallops


2 medium beetroot
1 Tbs butter
2 tsp red wine vinegar
1 Tbs water
100g Danish feta, chopped
20 scallops, cleaned and roe removed
Salt and pepper to taste
A drizzle of olive oil
Rocket or parsley to serve

Chop the leafy tops off the beetroot and then peel the main section of the vegetable.
Cut them into halves or quarters so you have manageable pieces.
Coursly grate the beetroot and set aside.
In a saucepan, melt the butter, then add the beetroot, vinegar and water. Pop the lid on and cook over medium heat for about 5 minutes, stirring occassionally.
Take the lid off and cook for another couple of minutes to boil off any remaining liquid. You want the beetroot to be tender, but not swimming in juices.
Remove from the heat and season with salt and pepper to taste.
Just before serving, stir through the chopped feta.

To cook the scallops, heat a pan with a drizzle of olive oil until hot.
Season the scallops with salt and pepper and then fry for about 40 seconds on each side, or until browned on the outside, but on the slightly raw side inside. How long you need to cook them will depend on how thick the scallops are.

To serve, place a good spoonful of the beetroot salad on the plate and then dot the scallops around it.
Scatter a couple of sprigs of parsley or a handful of rocket over the top and give it a grinding of cracked black pepper and a drizzle of extra virgin olive oil.

Enjoy!