Saturday, 21 March 2015

Goodbye eat quaff laugh

I've been doing a lot of thinking lately about my blog and where it's future lies. After 18 months of some great eating, quaffing and laughing, I think it's time to have a rest!

I have been finding it increasingly difficult to find the time to sit down and write, as well as work, be a good mum and wife and have some time to myself. Something had to give. Unfortunately the blog had to go!

I have really enjoyed posting about my food and wine adventures and hope you have too. It has been a great way for me to meet other bloggers and to try cooking new things each week, rather than falling into the rut of making the same things day in and day out.  Hopefully without the need to actually write about what I'm cooking, I'll still manage to cook meals that are delicious and interesting!

I plan to keep the eat quaff laugh Facebook page and instagram account happening, so you can still see what I'm eating and drinking. I'll try to post pictues a couple of times a week if I can. There just won't be any more blog posts for the time being.

Thanks so much for all your support over the past 18 months. It really has been fun :-)

Eat quaff laugh might be back in the future, but at this stage I'm not sure. In the meantime, keep enjoying wonderful food, fabulous wines and lots of laughter! I know that I will be.

Cheers :-)


Sunday, 15 March 2015

Breakfast Around The Tan And A Giveaway

This morning, I was lucky enough to be invited to the Melbourne Food and Wine Festival event 'Breakfast around the Tan' by the Mushroom Lovers Club.

This progressive breakfast around Melbourne's beautiful Tan Track, around the Botanic Gardens, was sponsored by Diabetes Australia - Victoria. The 5 stations of food were created by Healthy Byte, the healthy eating catering company of Bright Young Things. To keep recipes healthy and appropriate for those living with diabetes, all dishes were created with the input of Scoop Nutrition. The Mushroom Lovers Club were one of the sponsors and a highlight for the kids was meeting Mighty Mushroom. I couldn't resist a selfie with him either!


Unfortunately the weather in Melbourne this morning was rather cold, so it wasn't the glorious Autumn walk I was hoping for! Rugged up in jackets, with the kids on their bikes, it was still a lovely way to spend the morning.

We started with Acqua Panna water and a pear at the first stop. A hot coffee probably would have been a much better idea to warm up!

Next, a beautiful tub of Jalna Greek yoghurt and Goodness Superfoods Barley Clusters. This was delicious and one of my favourite courses. For a non-breakfast eater, this was right up my alley.


Next up was the only hot dish on the menu - Boston baked beans with balsamic mushrooms. The beans were warming and filling and the mushrooms added some acidity. This was a great, hearty dish, and being hot, was perfect on a cold morning. I'm certainly going to look up the recipe for the beans from the Healthy Byte website to make at home. Served with La Madre sourdough, it was a meal in itself.


The fourth course was a lovely sweet potato and ricotta frittata. Unfortunately this was served cold too, as it would have been much nicer hot. The sweet potato was beautiful and soft and matched really well with the slightly salty cheese. This would be a winner if served warm with some baby spinach and smoked salmon. Now there's a brunch idea for you! We also received a small bottle of Rauch ACE juice, which was delicious.


The final course was a barley wrap with omelette, avocado, baby spinach and tomato. Again this was served cold and on a hot day, would be fine. On a cold and grey morning, a bit of warmth and toastiness would have been fantastic. The flavours were still great and it was easy to eat on the go.


To finish off the 4.2km walk, we were given a glass of the Maggie Beer Ruby Cabernet non-alcoholic sparkling. It was slightly sweet, but with a nice acidity and bubble to it. The perfect refresher at the end of a long walk.


All in all, it was a lovely morning. You can't do much about the weather and Melbourne really is so fickle at this time of year. Yesterday was 30 degrees after all!

Healthy Byte did a wonderful job catering for so many people. At least 700 people were fed over the course of the morning. It would have been nice to have a few more hot dishes, given the cold weather, but I understand that the logistics of this can be difficult. Hot tea and coffee around the track would have gone down a treat too!

Thanks to the fantastic people at the Mushroom Lovers Club, I have a giveaway for you. Yippee!
The pack consists of a Mushroom Lovers bag, apron and a copy of the cookbook Mushrooms - The Great All Rounder.


To enter, all you have to do is comment below with your favourite way to enjoy mushrooms. Easy!

Competition starts now and closes on Sunday March 22 at 10pm. Open to Australian residents only.

Get your thinking (mushroom) caps on and get entering!!

Tuesday, 10 March 2015

Risotto Cakes

If you're anything like me, when you're cooking risotto, do you end up with way too much? I always measure out my rice, but for some reason the end result is a massive saucepan full of the stuff.

I love risotto, so it's really not that big an issue, but it does mean lots of leftovers. I don't need to take lunch to work, because I get a staff meal, so Mr eat quaff laugh ends up eating the same thing a few days in a row. Sometimes he doesn't mind, but other times he'd prefer something different.

A couple of weeks ago I made a batch of a delicious mushroom and asparagus risotto and ended up putting the leftovers in the freezer. We had so much going on at the time and just didn't need any for lunches.

I planned to use the leftovers for making arancini, which we both love. Who could not like crispy, deep fried balls of rice with a gooey, melty cheese centre? Mmmmmm.....

When I defrosted this lot, the texture of the rice had changed and it was a bit watery. I couldn't form it  into balls that would in any way stay together when I deep fried them. Not having any eggs on hand to help bind them together, I had to get a bit creative.

These risotto cakes were the end result, and they were perfect for a light weekend dinner.
The outside of the rice crisped up in the muffin tin and the cubes of mozzarella in the middle went all melty and stringy. Delicious!

They are lovely served hot, with your favourite chutney and a salad, but are also great cold for lunch the next day.


This really is just an idea, rather than a recipe. The quantities I've given will depend on how much risotto you have leftover and how cheesy you like the centre of the cakes to be. Have a play around and see what works best for you!


Risotto Cakes


Leftover risotto
Mozzarella cheese, cut into 1cm cubes
Panko crumbs
Parmesan cheese, grated
Oil spray for greasing

Preheat oven to 200 degrees.
Lightly grease a muffin tin with oil spray.
Spoon about a tablespoon of the risotto into the tin and push down with the back of a spoon.
Place 2 cubes of mozzarella in the centre and push into the rice slightly.
Spoon another scoop of risotto over the top to cover the cheese and press down gently.
Sprinkle some panko crumbs and parmesan cheese over the top of each risotto cake.
Bake in the oven for 15 minutes, or until the crumbs have turned a lovely golden brown and the edge of the rice is crispy.


Carefully remove the risotto cakes from the tin.

Serve warm with salad and chutney for a light meal.

Enjoy!


Thursday, 5 March 2015

Summer Vegetable Tarts

Even though it's now officially Autumn, there are still so many Summer vegetables around in the fruit and veg shops and markets. I know that our tomato plant is flourishing!

A light puff pastry tart is the perfect way to use up some of those vegetables in a fresh and easy way. Shop bought frozen puff pastry is just so easy to work with, and is great to have in the freezer to use for sweet and savoury treats, whenever the mood strikes you. As much as fresh pastry is delicious, as a working mum, I just don't have the time to make my own, especially puff pastry.


These tarts are perfect as a quick mid-week meal and would also be lovely as a light weekend lunch. Serve them with a salad or some roasted vegetables to make it a more substantial dinner.

The zucchini is only barely cooked, but because it is sliced so thinly, it is delicious. The creamy Danish feta adds saltiness and the roasted red capsicum sauce a beautiful sweetness.

I like making individual tarts, because they look much more pretty, but you could easily make this into one tart to serve at the table. For a dinner party, cut the pastry into nine or twelve squares to make canapés. Lovely to serve with a glass of Champagne at the beginning of the night!

 Whip these tarts up for your next lunch or dinner and see how quickly they disappear!


Summer Vegetable Tarts


2 red capsicums
1 Tbs olive oil
1 sheet frozen puff pastry, defrosted
80g Danish feta
2 spring onions, thinly sliced white and inner green part
A handful of mint leaves + extra to garnish, finely chopped
1 small zucchini
1 Tbs toasted pinenuts
Vegetables or salad to serve
Salt and pepper to taste


Preheat a grill to high heat.
Cut capsicums in half and remove seeds and membranes.
Place skin side up on a foil covered tray and grill until the skin is blackened and blistered.
Wrap the capsicum in the foil and set aside for 10 minutes for the skin to loosen. Peel the blackened skin off and discard.
Place roasted capsicum flesh and oil in a blender and whiz until smooth. Season to taste and set aside.

Preheat oven to 220 degrees.
Lay pastry sheet out on a work bench and cut into quarters. 
To make tarts, score the pastry completely around the outside, about 1cm in from the edge. Prick the centre with a fork. See the top tarts in the photo.
Alternatively, cut completely through the pastry 1cm in from the edge, except for 1cm at the two opposite corners. Fold the pastry strips across the square to create a decorative edge. Prick the centre with a fork. See the photo for the finished product.


Brush the outside of the pastry squares with milk and place on a tray lined with baking paper.

Par cook pastry cases for 10 minutes, or until puffed and golden. Use an oven mitt and a spoon to push down the centre of the pastry so that it is flat. Remove from the oven.


Using a vegetable peeler, cut long ribbons from the zucchini and set aside.
In a small bowl, mash feta with a fork until smooth. Add mint, spring onion and season with pepper. 
Spread the feta mixture into the pastry cases.


Top with zucchini ribbons and return to the oven for 5 minutes, or until the pastry is completely golden and the zucchini has softened.


Place blobs of the capsicum puree over the tarts and return to the oven for 1-2 minutes to warm through.
Carefully remove tarts from the baking tray onto serving plates. Sprinkle with toasted pinenuts and extra chopped mint.
Serve with vegetables or salad.

Enjoy!

Monday, 2 March 2015

Quinoa, Grape and Nectarine Salad

This weekend we went away with the family to celebrate my Father in Law's 60th birthday. My job was to bring a salad to eat at a BBQ lunch.

Not knowing exactly what cooking facilities I'd have available and wanting something that I could easily transport all the bits and pieces, I thought I'd look for a sturdy sort of salad. As I happened to be flicking through the latest Coles catalogue, I came across this recipe.


In true eat quaff laugh form, I modified it a little bit to suit my tastes, but it turned out to be an absolute winner! Everyone loved it and there was only a small bit left over, which is always a good sign.

I cooked the quinoa before we left home and just took it away with us in a container. The grapes I cooked in the morning and left to cool in the fridge, so that they wouldn't make the rest of the salad soggy. I didn't use up all the dressing on my salad, but you could use it all if you like a lot of dressing. Otherwise, keep it in the fridge for another time.

This was a great BBQ salad, but would be perfect to take anywhere you need to bring a share plate. The flavours were very summery, so if you're going to make it, you'll need to do it soon while nectarines are still in season. The white nectarine gave it a beautiful floral sweetness. Yellow nectarines would probably be quite nice too, but try to hunt out the white ones if you can.

To make this salad into a bit more of a meal, toss through some cooked chicken or flaked salmon for a protein hit.

Delicious!


Quinoa, Grape And Nectarine Salad


1/4 cup extra virgin olive oil
1/4 cup white wine vinegar
1 cup quinoa
3 cups red grapes, removed from stems
1/4 cup marsala
4 spring onions, washed and root end removed, thinly sliced white and inner green part
100g rocket
2 white nectarines, seeds removed and thinly sliced
80g Danish feta, chopped
1/4 cup toasted pinenuts
1/4 cup toasted macadamia nuts, chopped
Salt and pepper to taste

Combine oil and vinegar in a jar and season to taste. This is your dressing.
Bring a medium sized saucepan of water to the boil. Add quinoa and simmer for about 10 minutes, or until it is cooked. Remove from the heat and drain well. Set aside to cool.
Heat a drizzle of oil in a large frypan over medium heat. Add the grapes and toss for about 3 minutes, or until they start to soften.
Add the marsala to the hot pan and toss around to coat the grapes. Continue to cook for another 2-3 minutes, or until the marsala has evaporated, but the mixture isn't too dry. Tip the grapes into a bowl and set aside to cool.

In a large bowl, combine the quinoa, spring onions, rocket, grapes, feta, pinenuts and macadamias. Toss through half the dressing.
Add the nectarines and fold through carefully so they don't break up.
Season to taste and add a little bit more dressing if you think it needs it.

Enjoy!


Thursday, 26 February 2015

Swordfish Agrodolce

A few weeks ago I had a dinner party with some friends who had recently moved to Mount Isa. Living in a desert location in the middle of nowhere, the main thing they missed was fresh seafood. A seafood feast it was to be!

I started the night with panfried scallops on a cauliflower puree with crispy prosciutto and dill. It was amazing! Salty, sweet and a little bit earthy. A wonderful combination of flavours.


For main course, I decided on Swordfish with and agrodolce sauce. This dish was from the February 2015 issue of Australian Gourmet Traveller magazine. I have a subscription to this gorgeous magazine and try to cook something out of each issue when it arrives.

I had been eying off this recipe for a while and finally decided that this dinner party was the perfect opportunity to give it a try.


I had never had an agrodolce sauce before, so wasn't really sure how the flavours would combine. I needn't have worried. It was simply delicious! The thick, meaty swordfish steaks were the perfect match too. Hearty, but served medium rare, they were tender, juicy and just divine.

I'd certainly make this dish again. Swordfish isn't always the easiest fish to come across, but if you can find it, then definitely buy it. Another firm fleshed white fish would work too, but you wouldn't get the same texture to the flesh.

Served with some simple steamed asparagus, sprinkled with dukkah, this was certainly a dinner party worthy meal.


Swordfish With Agrodolce Sauce


6 skinless swordfish steaks
180 ml white wine vinegar
50 gm raw sugar
1 Spanish onion, finely chopped
50 gm currants
60 gm pine nuts
2 lemons, segmented
½ cup dill sprigs
Salt and pepper to taste

Preheat oven to 170C. 
Heat vinegar and sugar in a small saucepan, stirring to dissolve sugar. 
Place onion in a bowl, pour vinegar mixture over, add currants and set aside to infuse for 5 mins.

Roast pine nuts on an oven tray, shaking pan occasionally, for 5 minutes, or until golden.
Stir into onion mixture with lemon segments and set aside until ready to serve.
Just before serving, stir in the dill.

Heat a barbecue or char-grill pan over high heat. 
Brush swordfish steaks with olive oil and seaon to taste.
Grill for 2 minutes on each side or until golden and cooked medium-rare. How long you cook for will depend on the thickness of the fish.
Serve the fish with agrodolce spooned over the top.

Enjoy!

Monday, 23 February 2015

Warm Summer Pasta

The recipe for February in my lovely De Bortoli calendar is a beautiful tomato pasta. This dish couldn't have come at a better time for us, given the hundreds of tomatoes our little plants are producing at the moment!


I often make tomato based sauces for pasta, but I've never made one using balsamic vinegar as the main sauce ingredient. I thought it might have been a bit too acidic, but combined with the sweetness of homegrown tomatoes and the spicy salami, it was absolutely delicious.


Marinating the tomatoes in the vinegar, gave it a lovely intense flavour and made the whole dish very easy to put together. For an easy weeknight dinner, this was perfect.

This pasta will certainly become a regular in our household. My fruit bowl is still full of our ripe, red tomatoes, so I have a feeling I'll be making this one again very soon.


Warm Summer Pasta


5 tomatoes, chopped
8 semi dried tomatoes, sliced
60g pitted black olives, halved
3 Tbs basil, chopped
2 Tbs balsamic vinegar
300g fettucine or long pasta
1 Tbs olive oil
2 cloves garlic, finely chopped
2 Tbs fresh sage, chopped
6 slices of spicy salami, cut into strips
Pepper to taste
Parmesan cheese to serve

Place tomatoes, olives, basil and vinegar in a bowl and stand for 30 minutes.


Cook pasta in boiling water until tender, drain and keep warm.
Heat oil in a large pan and fry garlic, sage and salami until golden.


Remove from the heat and toss through the pasta with the tomato mixture.
Season to taste with pepper and serve with parmesan cheese.

Enjoy!


And To Drink....


The wine matching suggestion for this pasta dish is the De Bortoli Yarra Valley Estate Grown Chardonnay. The grapes from this wine come from the Dixons creek vineyard, which is a cool climate region of the Yarra Valley. These vines are low yielding older vines and so produce wines with a beautiful complexity and richness. 


The wine is made with minimal intervention to ensure that the true Chardonnay flavours shine through. The grapes are hand picked, whole bunch pressed and then fermented in French oak barrels.

This Estate Grown Chardonnay is a light yellow in colour with aromas of stone fruits and brioche. To taste, it is lovely and rich with a slight butteriness, a little minerality and acidity and beautiful fruity freshness. It was a perfect match to the sweetness of the tomatoes in the pasta. I thought that the vinegar might overwhelm the wine, but it was complex and bold enough to stand up on it's own.

The De Bortoli Yarra Valley Estate Grown Chardonnay was beautiful drinking as a current vintage, but would further develop over another couple of years. I might just have to go out and buy another bottle to try again in a few years time!


Saturday, 21 February 2015

Mushroom And Goat's Cheese Crepes

I'm a bit slow with getting this post up and running, but better late than never!

Tuesday this week was Pancake Day, so I wanted to cook pancakes of some sort to celebrate. The kids had an early morning pancake breakfast at school, so dinner was going to be the meal of the day that we got to eat them together. Not being much of a sweet person, I thought I'd go along the savoury route.

Mushroom and goat's cheese are a match made in heaven, and for a vegetarian dinner option, these were delicious!


This pancake recipe is the one that my Mum uses. We always grew up with thin pancakes, more in the style of crepes, rather than thick American ones. I find them much too doughy and heavy. Adding the soda water at the end helps to thin the batter and make the crepes nice and light. If you don't have any soda and don't want to open a new bottle, just use regular water.

Because you are rolling up these crepes with a filling, it doesn't matter if they are a bit wonky! Given I only make pancakes once or twice a year, mine are never particularly round. You can also make the crepes the day before you are going to eat them, as they store well in the fridge. Anything I can do to make dinner time a bit quicker and easier is always a winner!

Savoury crepes really are so versatile and you can fill them with anything you like. Chicken and mushroom in a white sauce, spinach and feta, roasted vegetables.............The options are endless! Experiment and find a combination that you like.


Mushroom And Goat's Cheese Crepes


For the crepes
1 1/4 cups plain flour
2 eggs
1 1/2 cups milk
1/2 cup soda water or regular water
Butter or oil spray for frying

Combine flour, eggs and milk into a smooth batter using a whisk. Set aside for at least 30 minutes.
Just before cooking, add the soda water and stir to combine.
Heat a crepe pan or frying pan over medium heat and brush with butter or spray lightly with oil.
Pour 1/3 cup mixture into the pan and swirl to coat the base evenly. You want crepes that are about 15-17cm in diameter and nice and thin.
When bubbles start to appear on the surface, flip with a spatula and cook the other side until lightly golden. Remove from the pan to a plate.
Repeat with the remaining mixture. You should get about 12 crepes.
Set aside to cool.


For the filling
20g butter
5 large field mushrooms, diced into medium sized pieces
1 small onion, diced
2 cloves of garlic, finely chopped
125g soft goat's cheese (I used the herbed one, but you could use a plain one too)
A handful of fresh thyme, finely chopped
Salt and pepper to taste

Heat a large frypan on medium heat and add butter until it melts and starts to bubble.
Add onion, garlic and mushrooms and fry until the onion is lightly golden and the mushrooms have released their juices and are soft.
Add the thyme and season to taste. Continue cooking until all the liquid has evaporated. You don't want soggy crepes!
Set aside to cool.


To put together
Lay all the crepes out on a work surface. You might not need all of them, but it's easier to be prepared.
Lightly grease a large baking dish that will fit the rolled crepes.
Place a couple of spoonfuls of the mushroom mixture along the centre of each crepe, using up all the mixture. You want to be reasonably generous with the filling, but not so much that you can't roll them up.
Break the goat's cheese up into small pieces and scatter over the top of the mushroom mixture. Use as much or little as you like, making sure you keep some aside to put on the top when you bake them.


Roll each of the crepes up with the filling and place them seam side down in the baking dish.
Dot the top with the remaining goat's cheese.


Preheat the oven to 180 degrees.
Bake the crepes for 15 to 20 minutes to just heat through and brown the edges of the crepes and the goat's cheese.
Serve with a light salad or vegies.

Enjoy!


And To Drink....


Slow cooked mushrooms match perfectly with a lovely Pinot Noir. All that beautiful funky flavour in the mushrooms complements the funky, but fruity, characters in the wine.

I must admit that I haven't really had many New Zealand Pinot Noir's and this one had been sitting in our cellar for a while. About time we opened it, I think!


A 2007 Ra Nui Pinot Noir from Marlborough on the South Island, this wine had a beautiful roundness and complexity to it. It was still beautiful and fruity with lots of cherry and black plum flavours, with a touch of spice. Being aged, it had lovely soft tannins and was nice and smooth. The fruit paired nicely with the mushrooms and the acidity in the goat's cheese. It really was a fantastic match.

Ra Nui make their wines organically and one of their vineyards has even been certified biodynamic. They use minimal intervention wine making, hand picking the grapes and whole bunch pressing.

In the more premium Estate grown Ra Nui range, they make a Pinot Noir, Gwurtztraminer, Pinot Gris, Chardonnay and Sauvignon Blanc.  They also make a very unique sounding Rosè, called Sexy Rexy, which is made from Syrah and Pinot Gris. In exceptional vintages Ra Nui also produce a limited edition single vineyard range. Currently a 2009 Syrah is available.

Now that I've tried their wines, I'll certainly be looking  out for them. The Rosè particularly sounds interesting. 

New Zealand really makes some wonderful wines and they certainly go far beyond the usual Sauvignon Blanc. It's time to explore more of the wines across the Tasman!

Monday, 16 February 2015

Cocobella Kids And A Cheeky Adults Only Dessert

A few weeks ago I was introduced to the delightful Cocobella Kids range of coconut water and juice. Unlike other flavoured coconut water drinks, these are the first ones in Australia formulated with kids in mind. They have no added sugar, no added colours or flavours and no additives or preservatives. Cocobella Kids is a lunchbox friendly and healthy coconut water drink for kids, made from 70% coconut water, 30% fruit juice and nothing else. As with any coconut water, it's also really high in electrolytes, so is a great thirst quencher for the kids during the summer or when they are playing sport.

The Cocobella Kids range contains about 40% less sugar than regular kids fruit juices, so it's a great option to include in their lunchbox or to take on a day out to the zoo or a picnic.


Little Miss and the Little Man loved the juices, which initially surprised me because they haven't really liked coconut water in the past. I'm also not generally a fan, but these were delicious! There were nods and gulps all around!

The two flavours, Apple Berry Breeze and Tropical Island, contain only coconut water and the corresponding juices. Apple Berry Breeze is a mixture of apple and blackcurrant juice and the Tropical Island contains mango, pineapple and grape.


They have a lovely fruit sweetness, without being over the top. There was certainly no risk of these drink boxes being left half full!

Unfortunately for my kids, they have a nude food policy at school, so I can't pack these in the lunchbox, but they'll definitely be included in the picnic bag for a day out. On a hot summer's day, freezing them beforehand would mean that they'd stay cool and refreshing all day long.

If you have little ones, or like flavoured coconut waters yourself, then definitely look out for Cocobella Kids in your local Woolworths. They come in 200ml BPA free Tetra-paks and retail for $3.49 a 3 pack.

***********************

Being a food and wine blogger, I couldn't let this opportunity go past without trying the Cocobella Kids range in a few adults only desserts.

My first thought was to freeze the drink in a shallow tray and then scrape the frozen ice to create a granita. Served over fresh mango or berries, this would be a delightful dessert. Not particularly adults only I know, but refreshing all the same.

To get a bit more fancy, how about putting a spoon or two of the granita in a half full glass of prosecco. An adults version of a spider! Perfect on a warm summer's night when you want a beautiful aperitif before dinner.

The real deal, however, was this mango jelly I made as dessert for Valentine's Day. A mixture of Tropical Island coconut water, fresh mango, Cointreau and gelatine. A simple dessert, made a little more fancy with the added alcohol. Top with a spoonful of natural or lemon yoghurt and some fresh mango and you have a lovely summer dessert. Next up, I'm going to try the same dessert, but using the Apple Berry Breeze with berries. I'm sure it will be equally delicious!


Mango, Cointreau And Coconut Water Jelly


1 mango
3 sheets of gelatine
1x200ml Cocobella Kids Tropical Island juice
30ml Cointreau
Extra mango and yoghurt to serve

Remove flesh from the mango and puree in a small food processor. You want about 1/2 cup.
Soak the gelatine leaves in cold water for 10 minutes, or until soft. Squeeze out the excess water.
Place gelatine and Cocobella Kids juice in a small heatproof bowl over a saucepan of simmering water.
Stir gently with a whisk to dissolve the gelatine completely.
Remove from the heat and add mango puree and Cointreau. Stir to combine.
Pour this mixture through a fine sieve into a jug, to remove any fibrous bits of the mango.
Pour your smooth mixture evenly into pretty glasses or bowls and place in the fridge for at least 4 hours to set.


To serve, dollop yoghurt onto the jelly and top with a few pieces of fresh mango.

Enjoy!

Thursday, 12 February 2015

Pear And Yoghurt Fritters

With Pancake Day coming up next week, I thought I'd share with you this really easy recipe for pear and yoghurt fritters.


They are part pikelet, part fritter and so easy! Using only four ingredients, they are really quick to whip up for an after school snack or a weekend, or even weekday, breakfast.

I used quite a green pear in mine, but if you used one that was really ripe and juicy, you might need to add a little bit more flour to hold it all together. If you have them, a handful of chopped walnuts would be delicious in the mixture too.

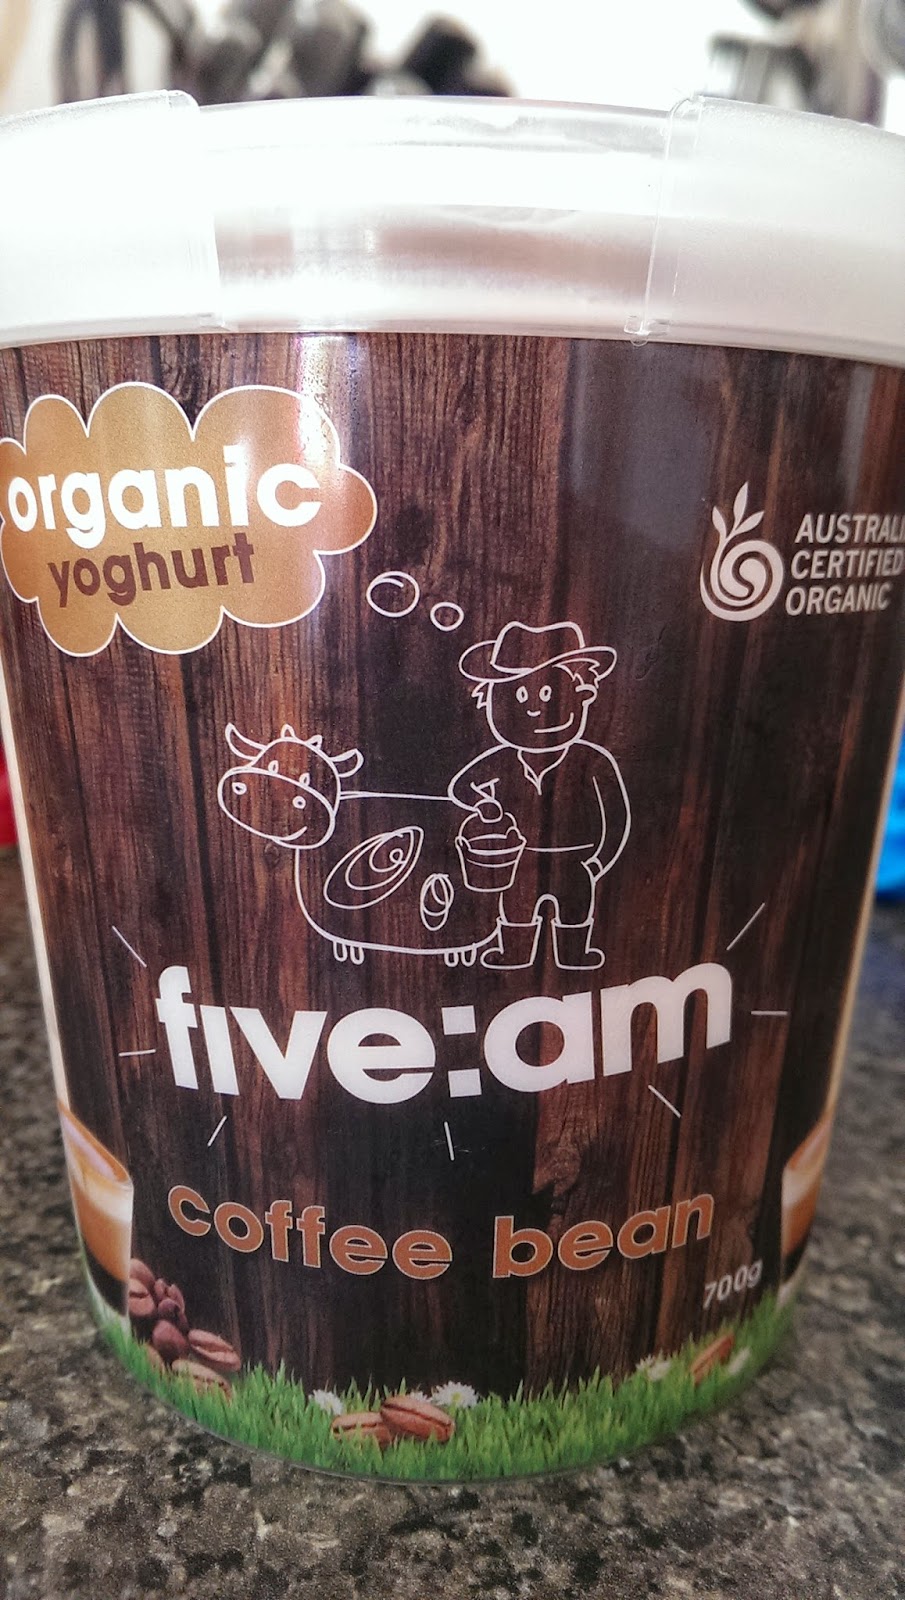
I used the five:am coffee bean yoghurt in my fritters, because I love the combination of coffee and pear and this yoghurt is thick and simply divine. Greek yoghurt would be lovely too. Try to avoid a really sweet, low fat flavoured yoghurt, if you can.


Serve them warm with an extra dollop of yoghurt and some fresh fruit for a light breakfast. They are great cold too, so pop some in your lunch box for morning tea!


Pear And Yoghurt Fritters


1 pear, cored and grated
1/2 cup yoghurt 
1/2 cup + 1 Tbs plain flour
1 Tbs caster sugar

Combine all ingredients in a bowl and stir well to combine.


Heat a frying pan and spray with oil spray if you need to.
Dollop rough tablespoons of mixture into the pan and flatten slightly. The mixture will be quite sticky.
Fry on one side until golden brown, then flip to cook the other side. Flatten a little bit to make sure the mixture cooks evenly.


Remove from the pan when cooked.


Serve with a dollop of yoghurt and some fresh fruit or just on their own.

Enjoy!

Monday, 9 February 2015

Celebratory Champagnes

The last two weeks have seen my birthday and my 6th Wedding Anniversary, so needless to say, there have been a couple of bottles of Champagne consumed!

If you haven't worked it out yet, I LOVE Champagne and Sparkling wine. I always have and I'm thinking that I probably always will!

Despite all the rules and regulations about what constitutes Champagne, it's amazing how different wines from different producers can taste. These two Champagnes were very different, as you can see just by looking at them, but were both absolutely delicious.


Piper-Heidsieck Rosè Sauvage Brut


This is a blended Rosè, added to the regular cuvee brut made by Piper-Heidsieck. It is a beautiful bright pink colour with fine beads. The colour comes from the grape skins from the Pinot Noir and Pinot Meunier used to make this wine. Given that pink is one of my favourite colours, this Champagne immediately appealed to me when it was poured from the bottle. The perfect wine for my birthday!

The beautiful colour isn't let down by the amazing aromas when you smell this champagne. As you'd expect from something this colour, it is full of red berry fruit, strawberry and a hint of citrus. There are also a few bright pink floral notes too.

To taste, it is almost like there is a party going on in your mouth! Lots of beautiful ripe red fruits, with some lovely yeastiness and some subtle acidity. There is a little bit of sweetness, but it certainly isn't a sweet Champagne.

This is one delicious wine, that looks absolutely stunning in the glass too. It is wonderful to enjoy on it's own, but matches perfectly with food. We enjoyed it with some maple mustard salmon that was cooked on cedar planks on the BBQ. I thought that the strong flavours in the fish might overpower the Champagne, but it had enough depth of flavour and body to complement it well.


This gorgeous Piper-Heidsieck Rosè Sauvage retails for about $54 a bottle, so it's not too expensive when you want something special for a celebration. Just look for the bright pink label.


Moet & Chandon Reserve Imperiale


This Moet & Chandon Reserve Imperiale was given to Mr eat quaff laugh by his parents after they returned from overseas. It is a duty free only Champagne. Even Mr Google doesn't seem to know anything about it and it's not on the Moet website. It must be very exclusive! All I do know is that this non-vintage is made from a combination of Chardonnay, Pinot Noir and Pinot Meunier.


We drank this wine to celebrate our 6th Wedding Anniversary. In order to include the kidlets in our celebrations, after all, they are partly the reason for our marriage, we decided to have fish and chips and Champagne. The perfect combination!


In the glass the Reserve Imperiale was a beautiful golden colour with hundreds of tiny bubbles rising to the surface of our glasses. It did look rather impressive.

On the nose, there was a combination of green apples and citrus with a delicious yeastiness, like freshly baked brioche or sweet yeast buns.

To taste, the citrus acidity is carefully balanced with luscious stone fruits and apple, with a touch of fruit sweetness.

It is a beautifully balanced Champagne with a smooth complexity. So refined and delicate.

Although we matched our bottle with salty, greasy fish and chips, it was a match made in heaven. The acidity cut through that fat beautifully. Equally, fresh prawns, scallops and oysters would be amazing to pair with this wine too.

If you happen to be travelling overseas, or have friends or family who are passing through duty free, make sure you get them to look out for this Champagne. It is certainly well worth trying,


****************************************************


With Valentine's Day coming up this weekend, make sure you look out for some Champagne and Sparkling wine bargains to surprise your loved one. Stick to your favourites, or look for something new and different. Although I have my favourite Champagnes that I return to again and again, it is nice to try something from a different producer or grower. You never know, it may become your new favourite tipple!