Thursday 18 December 2014

Macadamia And Ginger Shortbread

As much as I love a piece of Christmas cake or a mince pie at Christmas time, sometimes it's nice to have something a little bit lighter. Just a little morsel of something sweet and delcious. My mother in law makes great shortbread biscuits and rum balls every year, so I really can't compete with her on the biscuit stakes. The solution is to make flavoured shortbread, which is completely different, but oh so good.

This macadamia and glace ginger version I came across three or four years ago and have been making it ever since. It is delicious! A beautiful combination of buttery shortbread, nutty toasted macadamia nuts and sweet, but bitey glace ginger. Perfect to enjoy with a cup of tea or to give away as a homemade gift.

This shortbread is nice and short and can tend to be a bit crumbly. Make sure you don't overcook it, otherwise it can be really hard to cut into pieces without falling apart. Making it into one large 'biscuit' makes it very quick to make. If you have a mixer, it really only takes a few minutes to combine all the ingredients.

If you don't normally like glace ginger, I'd suggest that you try this recipe and see if it changes your mind. Being finely chopped it just adds a beautiful flavour without being overwhelming. If you really can't stand it, maybe use dried cranberries instead for a festive look.


Macadamia And Ginger Shortbread


100g macadamia nuts
250g butter, softened
1/2 cup caster sugar plus extra to sprinkle
2 cups plain flour
1/2 cup cornflour
100g glace ginger, finely chopped

Preheat oven to 140 degrees.
Spread macadamia nuts on a baking tray and toast for 8 minutes or until golden. Remove from the oven and allow to cool.
Coarsely chop nuts and set aside.


Use a mixer or hand beater to cream butter and sugar until light and creamy.
Add flour and gently mix to combine.
Stir through nuts and ginger.


Tip dough onto a large piece of baking paper on a baking tray and shape into a large rectangle, about 1cm thick.
Score dough into fingers and then prick with a fork and sprinkle with a little extra caster sugar.


Bake for 30 minutes or until pale golden.


Remove from the oven and cool completely on tray before cutting into fingers at markings.

Wrap in cellophane with red and green ribbons to give as a gift, or store in an airtight container for a week or so (if it lasts that long!)


Enjoy!

Monday 15 December 2014

Chocolate Honeycomb Fudge

Over the past few weeks I've been looking at different recipes that would be good to give as gifts to the teachers at my daughter's school and my son's childcare centre. I wanted something that was delicious, but also easy to make and not needing cream or anything that was going to go off if it wasn't eaten quickly.

I came across this simple Chocolate and Malteser Fudge from Lauren at Create Bake Make and knew that I had to give it a go! Only 4 ingredients makes it perfect.

Instead of Maltesers, I decided to have a go with chocolate coated honeycomb instead. I smashed up my honeycomb and stirred it through the fudge mixture, rather than just pouring it over the top. I thought it would look much nicer this way and would have the honeycomb throughout the fudge, rather than just on top.


The end result was delicious! Of course, I had to trim off and try the wonky edges because I couldn't possibly give them away, could I!

If you like baking and all things sweet, then definitely look up Create Bake Make. So many wonderful ideas for cakes, biscuits, slices and other treats.

Now to get onto my other Christmas baking so it's ready to pack up for tomorrow.


Chocolate Honeycomb Fudge

200g block dark chocolate
200g block milk chocolate
1 tin condensed milk
200g packet chocolate coated honeycomb

Line an 18x28cm rectangular slice tin with baking paper so that it overhangs the sides.
Using a rolling pin, crush the honeycomb into medium sized chunks in the packet.
Break the chocolate into squares and place in a microwave safe bowl with the condensed milk.
Microwave in 30 second burst, stirring between each go to combine the chocolate and condensed milk.


Continue until the chocolate is all melted and the mixture is smooth when stirred. Mine took 4 goes.
Quickly stir through the honeycomb pieces until it is all combined and coated in the fudge mixture.


Pour into the tin and press to the edges and smooth the top.


Set in the fridge for a couple of hours or overnight.
Lift the slice out of the tin using the paper and cut into small squares with a sharp knife.

Give away as a present, wrapped in celophane with a Christmas ribbon or keep it as a treat for yourself :-)

Enjoy!

Friday 12 December 2014

Salami, Feta And Tomato Pasta

As it gets closer to the crazy Christmas end of the year, I'm finding that there just isn't enough time to do everything that I need to do. Even trying to find the time to sit down and write up recipes for the blog is getting difficult.

This pasta from the other night was so easy to make and probably took less time to make than to write up! The combination of crispy salami, salty feta, sweet tomatoes and spicy rocket was beautiful.


Not just around Christmas, but any time of year, I like to try to use up what's in the fridge at least once a week, so that I don't have stuff sitting around for ages. It's a great way to stop food wastage and can lead to some interesting experiments!

This pasta was light and tasty and helped to clean out the fridge. If you wanted to add a few extra ingredients to make it a bit more fancy you could, but at this time of year when there is so much rich food on offer, as simple dish is always a good idea.

Salami, Feta And Tomato Pasta

250g short pasta
100g salami, thickly sliced into circles and then halved
2 tomatoes, diced
A few big handfuls of rocket
A handful of mint leaves, finely chopped
Juice of half a lemon
100g Danish feta, diced
Salt and pepper to taste

Cook pasta as per packet directions and drain, reserving about a cup of the pasta cooking water. Set aside.
In the same saucepan, fry salami pieces until they release their fat and become crispy.
Toss the cooked pasta through the salami fat to coat.
Over a medium heat, add tomato, rocket, mint and lemon juice and toss to combine and to wilt the rocket.


Season to taste and add some of the pasta water if it seems too dry.
At the last minute, stir through the creamy feta until it melts and creates a sauce.

Serve in bowls with extra feta and rocket on top, if you like.

Enjoy!


Monday 8 December 2014

Golden Spiced Christmas Biscuits

This year I've tried to add some Christmas baking into the kids Advent calendars, so that they're not having chocolate every day. Weekends really are the only time we have for baking, so biscuits were in order this weekend.

As much as I love gingerbread, sometimes they can be a bit strong for the kids. These spiced biscuits have a beautiful treacle flavour from the golden syrup and brown sugar and a nice mild spice from the cinnamon and mixed spice. My husband even proclaimed that they were the best Christmas biscuits I've ever made! Smiles all around.

I think these biscuits are perfect just as they are, but if you do like a more gingery flavour, add 1/2 tsp ground ginger to the mix too.

Decorate with icing pens if you have them, or icing in a piping bag with a very fine tip. You could use  sprinkles or silver cachous if you liked too.

Enjoy them with a cup of tea or coffee when you want something sweet, but not too rich and fancy.


Golden Spiced Christmas Biscuits

1 cup plain flour + extra for dusting
1/2 cup brown sugar
1 tsp ground cinnamon
1/2 tsp mixed spice
75g butter, cubed
1/4 cup golden syrup
Icing pens for decorating

Preheat oven to 160 degrees and line 2 baking trays with baking paper.
In a food processor, combine flour, sugar, spices and butter. Whiz until the mixture resembles bread crumbs.
Tip into a bowl and add golden syrup. Using your hands, mix until a soft dough forms.
Tip out onto a lightly floured bench and knead for a minute or so until the dough is smooth.
Wrap in plastic wrap and put in the fridge for 30 minutes.

Roll the dough out onto a lightly floured surface until 5mm thick.
Cut out your desired shapes and place onto trays with a little bit of room for spreading.


Bake for about 10 minutes, or until golden.
Remove from the oven and cool on trays before transferring to a rack to cool completely.
When cold, decorate as desired with icing.

Enjoy!


Thursday 4 December 2014

Green Filo Pie

With all the Christmas parties, feasting and drinking that are going on at this time of year, sometimes it's nice to have a simple dinner at home with lots of green vegies. This pie is the perfect dish.

It really is easy to make and you can prepare it in the morning, or even the day before, and then just pop it in the oven when you're ready to eat.

It's fantastic hot, straight out of the oven, when the filo pastry is all crispy, but it's also nice to have cold. Perfect to take on a picnic or for lunch the next day.

I used cavalo nero and kale for my greens, because the fruit shop had them on the clearance table, but you could use spinach, silverbeet, chard or any anything else that takes your fancy. Feel free to use whatever herbs you have on hand too. Dill, basil, parsley, coriander, oregano.......they are all lovely.

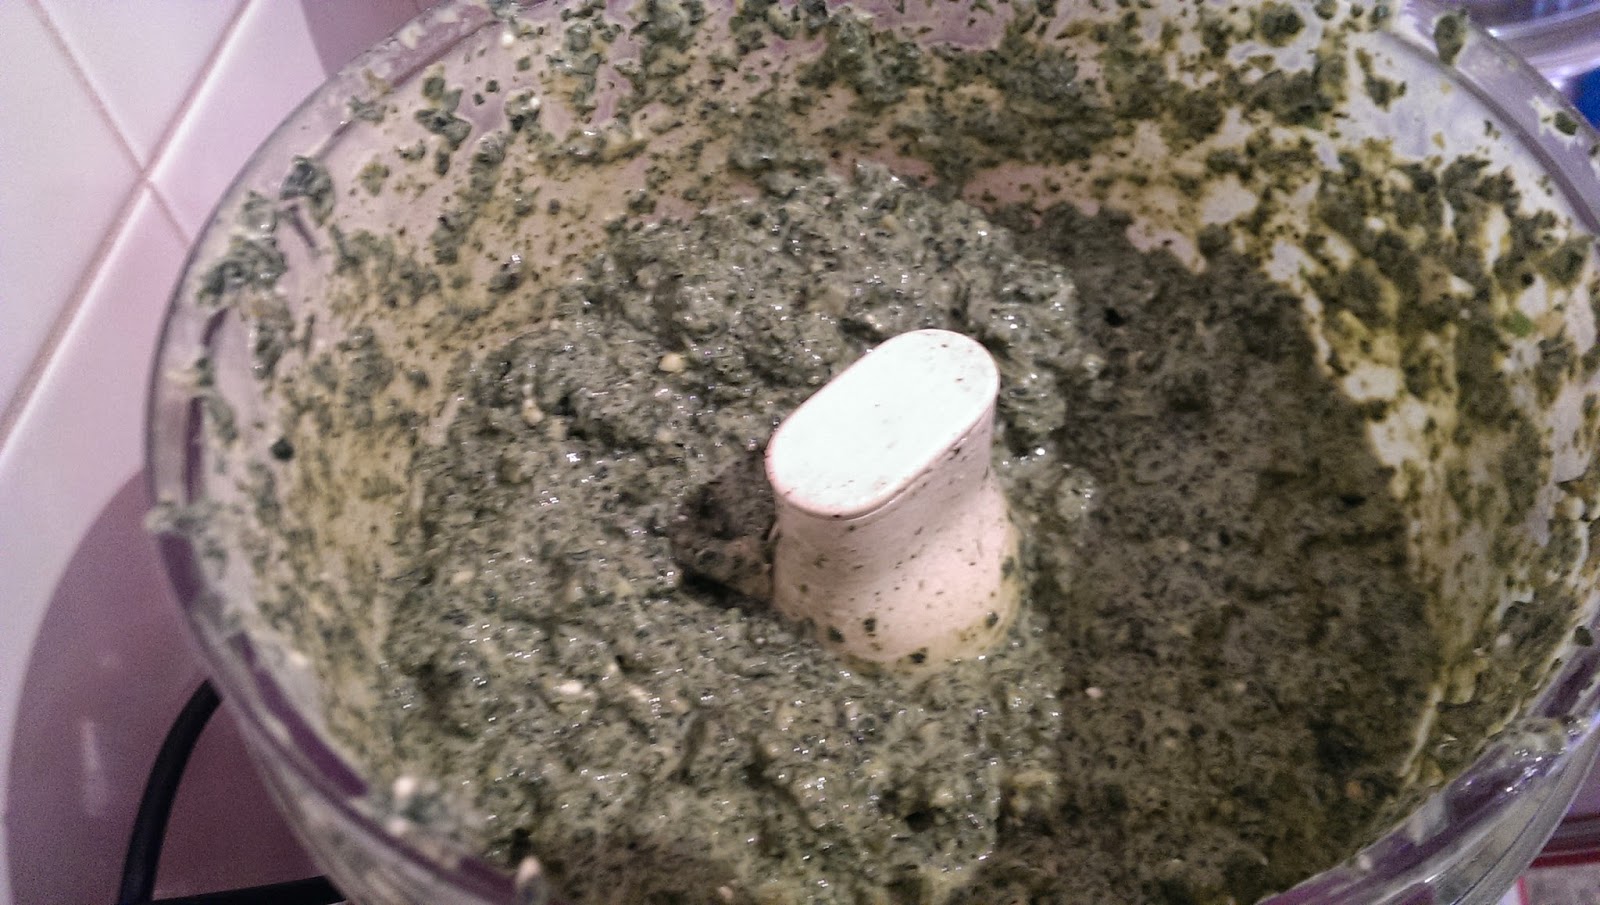
I've made this pie lots of times before, but never thought to put the filling mixture in the food processor to combine it. Normally I stir everything together in a big bowl, which leaves separate chunks of ricotta and spinach. It's so much easier to whiz it all up and have a lovely green pie with a much smoother texture. I'll definitely be doing this again next time.

The Greeks may not approve of my version of cheese and spinach pie, but I think it's pretty tasty!


Green Filo Pie


2 bunches of greens
300g fresh ricotta cheese
130g feta cheese, chopped
4 eggs
A handful each of parsley and mint leaves
1/4 cup sour cream or creme fraiche
40g Parmesan cheese, coarsely grated
Pepper to taste
1/4 tsp ground nutmeg
2 cloves of garlic, chopped
1 small onion, diced
375g packet of filo pastry, at room temperature

Wash the greens and trim the woody stems and veins from the leaves and coarsely chop.
Blanch in boiling water for 30 seconds, or until wilted.
Remove from the water and drain well in a colander. Squeeze to remove as much water as possible.
Set aside to cool.
In a food processor, combine all the ingredients except the filo pastry. Whiz to combine and until it's a lovely green colour and quite smooth. Season to taste with pepper. You shouldn't need much salt as the parmesan and feta are salty.


Preheat oven to 180 degrees.
Lightly grease a large baking dish with oil spray.
Layer dish with sheets of filo, spraying lightly between each sheet with a little of the oil spray. I needed to overlap the sheets to cover the base of my tray and allow enough overhand to fold over the top of the pie. You want about 5 layers of pastry to make a sturdy base.
Fill the case with all of the spinach mixture and spread evenly in the dish.


Take one piece of filo pastry and fold into thirds. Place in the centre of the pie and then fold the edges in to create a parcel.
Lightly spray the top with oil spray.


Bake in the oven for 45 minutes, or until the top is golden and the filo pastry crispy.
Remove from the oven and allow to sit for 5 minutes before serving.


To serve, cut into large wedges and serve with a simple salad and your favourite tomato chutney.

Enjoy!

Monday 1 December 2014

Christmas Berry Cheesecake

I love a no-bake cheesecake and this one is based on my Mum's recipe, which came from who knows where originally. I don't think I ever had a baked cheesecake growing up and now still prefer the fresh, creamy version straight from the fridge.

This is the easiest cheesecake recipe I've ever come across. No need for gelatine, whipping cream or anything difficult. Just throw everything into the mixer and its done. Mind you, it's not the healthiest either, but it tastes damn good! Don't be tempted to use light cream cheese or skim condensed milk as I have done in the past. The cheesecake just won't set. Fine if you want to serve it in small glasses or ramekins, but not so good if you want a cake that doesn't turn into a puddle!

I've modified the original recipe, as you do, to make it a bit more Christmassy. I hope you enjoy it too. Using some of the raspberry white chocolate Tim Tams in the crumb makes the crust a bit more fancy and a gorgeous pink colour. Leave them out if you can't find them. Just make up the weight with regular sweet biscuits. Ginger nuts are great too.


I don't like a very thick biscuit base on my cheese cake, so this makes only a thin crust. If you prefer to have a thicker crust, or want the biscuits to come up the side of the tin too, then double or even triple this part of the recipe. If you want a really thick cheesecake layer, double that part of the recipe too. I always think thinner is better, especially at this time of year when there are so many treats on offer and you just want a small piece of deliciousness!


So that the end result doesn't end up too messy, don't put the berries on the top until you're just about to serve. If you are using frozen berries, you'll end up with a bit of juice which you can drizzle over the top too. This looks really pretty and gives an extra tartness. If you can get your hands on fresh berries, then go for it.


Christmas Berry Cheesecake


90g packet of Zumbo Raspberry White Chocolate Tim Tams
100g plain sweet biscuits
100g butter, melted

250g cream cheese, softened
1 can of condensed milk
80ml lemon juice (or to taste)
1 cup mixed berries (I used defrosted frozen raspberries, blueberries and fresh pomegranate jewels)

Line a 24cm springform cake tin with baking paper.
Place Tim Tams and sweet biscuits in a food processor and whiz until they look like sand. If you don't have a food processor, place them in a bag and crush them with a rolling pin.


Tip the crumbs into a bowl and stir in melted butter. Mix until well combined.
Press the crumb mixture into the base of the tin, making sure there are no holes and the crust goes right to the edges.
Place in the fridge to harden.


For the filling, place the cream cheese into a mixer with a paddle and beat until softened and smooth.
Add half the tin of condensed milk and continue to beat until smooth.
Add the remaining condensed milk and lemon juice and beat again until combined.
Pour the filling over the base and smooth the top.


Place in the fridge over night to set.

To serve, carefully unlatch the springform tin and peel off the lining paper.
Remove the crust from the base of the tin using a spatula or 2 cake servers.
Place on serving plate and mound the berries and any juices over the top.


Enjoy!