Thursday, 26 February 2015

Swordfish Agrodolce

A few weeks ago I had a dinner party with some friends who had recently moved to Mount Isa. Living in a desert location in the middle of nowhere, the main thing they missed was fresh seafood. A seafood feast it was to be!

I started the night with panfried scallops on a cauliflower puree with crispy prosciutto and dill. It was amazing! Salty, sweet and a little bit earthy. A wonderful combination of flavours.


For main course, I decided on Swordfish with and agrodolce sauce. This dish was from the February 2015 issue of Australian Gourmet Traveller magazine. I have a subscription to this gorgeous magazine and try to cook something out of each issue when it arrives.

I had been eying off this recipe for a while and finally decided that this dinner party was the perfect opportunity to give it a try.


I had never had an agrodolce sauce before, so wasn't really sure how the flavours would combine. I needn't have worried. It was simply delicious! The thick, meaty swordfish steaks were the perfect match too. Hearty, but served medium rare, they were tender, juicy and just divine.

I'd certainly make this dish again. Swordfish isn't always the easiest fish to come across, but if you can find it, then definitely buy it. Another firm fleshed white fish would work too, but you wouldn't get the same texture to the flesh.

Served with some simple steamed asparagus, sprinkled with dukkah, this was certainly a dinner party worthy meal.


Swordfish With Agrodolce Sauce


6 skinless swordfish steaks
180 ml white wine vinegar
50 gm raw sugar
1 Spanish onion, finely chopped
50 gm currants
60 gm pine nuts
2 lemons, segmented
½ cup dill sprigs
Salt and pepper to taste

Preheat oven to 170C. 
Heat vinegar and sugar in a small saucepan, stirring to dissolve sugar. 
Place onion in a bowl, pour vinegar mixture over, add currants and set aside to infuse for 5 mins.

Roast pine nuts on an oven tray, shaking pan occasionally, for 5 minutes, or until golden.
Stir into onion mixture with lemon segments and set aside until ready to serve.
Just before serving, stir in the dill.

Heat a barbecue or char-grill pan over high heat. 
Brush swordfish steaks with olive oil and seaon to taste.
Grill for 2 minutes on each side or until golden and cooked medium-rare. How long you cook for will depend on the thickness of the fish.
Serve the fish with agrodolce spooned over the top.

Enjoy!

Monday, 23 February 2015

Warm Summer Pasta

The recipe for February in my lovely De Bortoli calendar is a beautiful tomato pasta. This dish couldn't have come at a better time for us, given the hundreds of tomatoes our little plants are producing at the moment!


I often make tomato based sauces for pasta, but I've never made one using balsamic vinegar as the main sauce ingredient. I thought it might have been a bit too acidic, but combined with the sweetness of homegrown tomatoes and the spicy salami, it was absolutely delicious.


Marinating the tomatoes in the vinegar, gave it a lovely intense flavour and made the whole dish very easy to put together. For an easy weeknight dinner, this was perfect.

This pasta will certainly become a regular in our household. My fruit bowl is still full of our ripe, red tomatoes, so I have a feeling I'll be making this one again very soon.


Warm Summer Pasta


5 tomatoes, chopped
8 semi dried tomatoes, sliced
60g pitted black olives, halved
3 Tbs basil, chopped
2 Tbs balsamic vinegar
300g fettucine or long pasta
1 Tbs olive oil
2 cloves garlic, finely chopped
2 Tbs fresh sage, chopped
6 slices of spicy salami, cut into strips
Pepper to taste
Parmesan cheese to serve

Place tomatoes, olives, basil and vinegar in a bowl and stand for 30 minutes.


Cook pasta in boiling water until tender, drain and keep warm.
Heat oil in a large pan and fry garlic, sage and salami until golden.


Remove from the heat and toss through the pasta with the tomato mixture.
Season to taste with pepper and serve with parmesan cheese.

Enjoy!


And To Drink....


The wine matching suggestion for this pasta dish is the De Bortoli Yarra Valley Estate Grown Chardonnay. The grapes from this wine come from the Dixons creek vineyard, which is a cool climate region of the Yarra Valley. These vines are low yielding older vines and so produce wines with a beautiful complexity and richness. 


The wine is made with minimal intervention to ensure that the true Chardonnay flavours shine through. The grapes are hand picked, whole bunch pressed and then fermented in French oak barrels.

This Estate Grown Chardonnay is a light yellow in colour with aromas of stone fruits and brioche. To taste, it is lovely and rich with a slight butteriness, a little minerality and acidity and beautiful fruity freshness. It was a perfect match to the sweetness of the tomatoes in the pasta. I thought that the vinegar might overwhelm the wine, but it was complex and bold enough to stand up on it's own.

The De Bortoli Yarra Valley Estate Grown Chardonnay was beautiful drinking as a current vintage, but would further develop over another couple of years. I might just have to go out and buy another bottle to try again in a few years time!


Saturday, 21 February 2015

Mushroom And Goat's Cheese Crepes

I'm a bit slow with getting this post up and running, but better late than never!

Tuesday this week was Pancake Day, so I wanted to cook pancakes of some sort to celebrate. The kids had an early morning pancake breakfast at school, so dinner was going to be the meal of the day that we got to eat them together. Not being much of a sweet person, I thought I'd go along the savoury route.

Mushroom and goat's cheese are a match made in heaven, and for a vegetarian dinner option, these were delicious!


This pancake recipe is the one that my Mum uses. We always grew up with thin pancakes, more in the style of crepes, rather than thick American ones. I find them much too doughy and heavy. Adding the soda water at the end helps to thin the batter and make the crepes nice and light. If you don't have any soda and don't want to open a new bottle, just use regular water.

Because you are rolling up these crepes with a filling, it doesn't matter if they are a bit wonky! Given I only make pancakes once or twice a year, mine are never particularly round. You can also make the crepes the day before you are going to eat them, as they store well in the fridge. Anything I can do to make dinner time a bit quicker and easier is always a winner!

Savoury crepes really are so versatile and you can fill them with anything you like. Chicken and mushroom in a white sauce, spinach and feta, roasted vegetables.............The options are endless! Experiment and find a combination that you like.


Mushroom And Goat's Cheese Crepes


For the crepes
1 1/4 cups plain flour
2 eggs
1 1/2 cups milk
1/2 cup soda water or regular water
Butter or oil spray for frying

Combine flour, eggs and milk into a smooth batter using a whisk. Set aside for at least 30 minutes.
Just before cooking, add the soda water and stir to combine.
Heat a crepe pan or frying pan over medium heat and brush with butter or spray lightly with oil.
Pour 1/3 cup mixture into the pan and swirl to coat the base evenly. You want crepes that are about 15-17cm in diameter and nice and thin.
When bubbles start to appear on the surface, flip with a spatula and cook the other side until lightly golden. Remove from the pan to a plate.
Repeat with the remaining mixture. You should get about 12 crepes.
Set aside to cool.


For the filling
20g butter
5 large field mushrooms, diced into medium sized pieces
1 small onion, diced
2 cloves of garlic, finely chopped
125g soft goat's cheese (I used the herbed one, but you could use a plain one too)
A handful of fresh thyme, finely chopped
Salt and pepper to taste

Heat a large frypan on medium heat and add butter until it melts and starts to bubble.
Add onion, garlic and mushrooms and fry until the onion is lightly golden and the mushrooms have released their juices and are soft.
Add the thyme and season to taste. Continue cooking until all the liquid has evaporated. You don't want soggy crepes!
Set aside to cool.


To put together
Lay all the crepes out on a work surface. You might not need all of them, but it's easier to be prepared.
Lightly grease a large baking dish that will fit the rolled crepes.
Place a couple of spoonfuls of the mushroom mixture along the centre of each crepe, using up all the mixture. You want to be reasonably generous with the filling, but not so much that you can't roll them up.
Break the goat's cheese up into small pieces and scatter over the top of the mushroom mixture. Use as much or little as you like, making sure you keep some aside to put on the top when you bake them.


Roll each of the crepes up with the filling and place them seam side down in the baking dish.
Dot the top with the remaining goat's cheese.


Preheat the oven to 180 degrees.
Bake the crepes for 15 to 20 minutes to just heat through and brown the edges of the crepes and the goat's cheese.
Serve with a light salad or vegies.

Enjoy!


And To Drink....


Slow cooked mushrooms match perfectly with a lovely Pinot Noir. All that beautiful funky flavour in the mushrooms complements the funky, but fruity, characters in the wine.

I must admit that I haven't really had many New Zealand Pinot Noir's and this one had been sitting in our cellar for a while. About time we opened it, I think!


A 2007 Ra Nui Pinot Noir from Marlborough on the South Island, this wine had a beautiful roundness and complexity to it. It was still beautiful and fruity with lots of cherry and black plum flavours, with a touch of spice. Being aged, it had lovely soft tannins and was nice and smooth. The fruit paired nicely with the mushrooms and the acidity in the goat's cheese. It really was a fantastic match.

Ra Nui make their wines organically and one of their vineyards has even been certified biodynamic. They use minimal intervention wine making, hand picking the grapes and whole bunch pressing.

In the more premium Estate grown Ra Nui range, they make a Pinot Noir, Gwurtztraminer, Pinot Gris, Chardonnay and Sauvignon Blanc.  They also make a very unique sounding Rosè, called Sexy Rexy, which is made from Syrah and Pinot Gris. In exceptional vintages Ra Nui also produce a limited edition single vineyard range. Currently a 2009 Syrah is available.

Now that I've tried their wines, I'll certainly be looking  out for them. The Rosè particularly sounds interesting. 

New Zealand really makes some wonderful wines and they certainly go far beyond the usual Sauvignon Blanc. It's time to explore more of the wines across the Tasman!

Monday, 16 February 2015

Cocobella Kids And A Cheeky Adults Only Dessert

A few weeks ago I was introduced to the delightful Cocobella Kids range of coconut water and juice. Unlike other flavoured coconut water drinks, these are the first ones in Australia formulated with kids in mind. They have no added sugar, no added colours or flavours and no additives or preservatives. Cocobella Kids is a lunchbox friendly and healthy coconut water drink for kids, made from 70% coconut water, 30% fruit juice and nothing else. As with any coconut water, it's also really high in electrolytes, so is a great thirst quencher for the kids during the summer or when they are playing sport.

The Cocobella Kids range contains about 40% less sugar than regular kids fruit juices, so it's a great option to include in their lunchbox or to take on a day out to the zoo or a picnic.


Little Miss and the Little Man loved the juices, which initially surprised me because they haven't really liked coconut water in the past. I'm also not generally a fan, but these were delicious! There were nods and gulps all around!

The two flavours, Apple Berry Breeze and Tropical Island, contain only coconut water and the corresponding juices. Apple Berry Breeze is a mixture of apple and blackcurrant juice and the Tropical Island contains mango, pineapple and grape.


They have a lovely fruit sweetness, without being over the top. There was certainly no risk of these drink boxes being left half full!

Unfortunately for my kids, they have a nude food policy at school, so I can't pack these in the lunchbox, but they'll definitely be included in the picnic bag for a day out. On a hot summer's day, freezing them beforehand would mean that they'd stay cool and refreshing all day long.

If you have little ones, or like flavoured coconut waters yourself, then definitely look out for Cocobella Kids in your local Woolworths. They come in 200ml BPA free Tetra-paks and retail for $3.49 a 3 pack.

***********************

Being a food and wine blogger, I couldn't let this opportunity go past without trying the Cocobella Kids range in a few adults only desserts.

My first thought was to freeze the drink in a shallow tray and then scrape the frozen ice to create a granita. Served over fresh mango or berries, this would be a delightful dessert. Not particularly adults only I know, but refreshing all the same.

To get a bit more fancy, how about putting a spoon or two of the granita in a half full glass of prosecco. An adults version of a spider! Perfect on a warm summer's night when you want a beautiful aperitif before dinner.

The real deal, however, was this mango jelly I made as dessert for Valentine's Day. A mixture of Tropical Island coconut water, fresh mango, Cointreau and gelatine. A simple dessert, made a little more fancy with the added alcohol. Top with a spoonful of natural or lemon yoghurt and some fresh mango and you have a lovely summer dessert. Next up, I'm going to try the same dessert, but using the Apple Berry Breeze with berries. I'm sure it will be equally delicious!


Mango, Cointreau And Coconut Water Jelly


1 mango
3 sheets of gelatine
1x200ml Cocobella Kids Tropical Island juice
30ml Cointreau
Extra mango and yoghurt to serve

Remove flesh from the mango and puree in a small food processor. You want about 1/2 cup.
Soak the gelatine leaves in cold water for 10 minutes, or until soft. Squeeze out the excess water.
Place gelatine and Cocobella Kids juice in a small heatproof bowl over a saucepan of simmering water.
Stir gently with a whisk to dissolve the gelatine completely.
Remove from the heat and add mango puree and Cointreau. Stir to combine.
Pour this mixture through a fine sieve into a jug, to remove any fibrous bits of the mango.
Pour your smooth mixture evenly into pretty glasses or bowls and place in the fridge for at least 4 hours to set.


To serve, dollop yoghurt onto the jelly and top with a few pieces of fresh mango.

Enjoy!

Thursday, 12 February 2015

Pear And Yoghurt Fritters

With Pancake Day coming up next week, I thought I'd share with you this really easy recipe for pear and yoghurt fritters.


They are part pikelet, part fritter and so easy! Using only four ingredients, they are really quick to whip up for an after school snack or a weekend, or even weekday, breakfast.

I used quite a green pear in mine, but if you used one that was really ripe and juicy, you might need to add a little bit more flour to hold it all together. If you have them, a handful of chopped walnuts would be delicious in the mixture too.

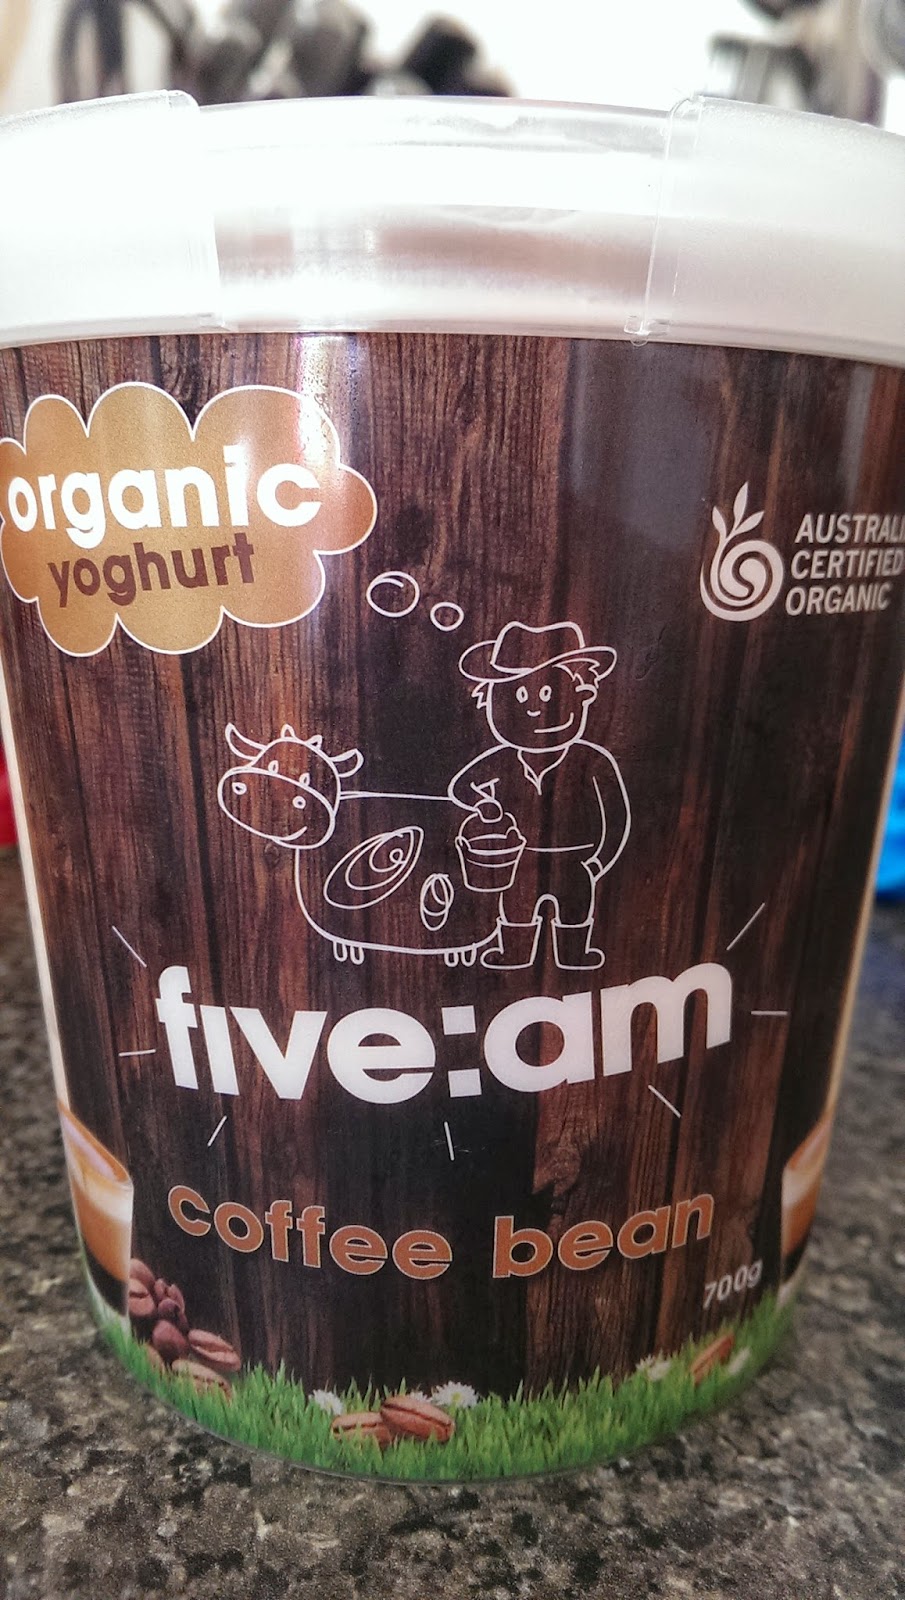
I used the five:am coffee bean yoghurt in my fritters, because I love the combination of coffee and pear and this yoghurt is thick and simply divine. Greek yoghurt would be lovely too. Try to avoid a really sweet, low fat flavoured yoghurt, if you can.


Serve them warm with an extra dollop of yoghurt and some fresh fruit for a light breakfast. They are great cold too, so pop some in your lunch box for morning tea!


Pear And Yoghurt Fritters


1 pear, cored and grated
1/2 cup yoghurt 
1/2 cup + 1 Tbs plain flour
1 Tbs caster sugar

Combine all ingredients in a bowl and stir well to combine.


Heat a frying pan and spray with oil spray if you need to.
Dollop rough tablespoons of mixture into the pan and flatten slightly. The mixture will be quite sticky.
Fry on one side until golden brown, then flip to cook the other side. Flatten a little bit to make sure the mixture cooks evenly.


Remove from the pan when cooked.


Serve with a dollop of yoghurt and some fresh fruit or just on their own.

Enjoy!

Monday, 9 February 2015

Celebratory Champagnes

The last two weeks have seen my birthday and my 6th Wedding Anniversary, so needless to say, there have been a couple of bottles of Champagne consumed!

If you haven't worked it out yet, I LOVE Champagne and Sparkling wine. I always have and I'm thinking that I probably always will!

Despite all the rules and regulations about what constitutes Champagne, it's amazing how different wines from different producers can taste. These two Champagnes were very different, as you can see just by looking at them, but were both absolutely delicious.


Piper-Heidsieck Rosè Sauvage Brut


This is a blended Rosè, added to the regular cuvee brut made by Piper-Heidsieck. It is a beautiful bright pink colour with fine beads. The colour comes from the grape skins from the Pinot Noir and Pinot Meunier used to make this wine. Given that pink is one of my favourite colours, this Champagne immediately appealed to me when it was poured from the bottle. The perfect wine for my birthday!

The beautiful colour isn't let down by the amazing aromas when you smell this champagne. As you'd expect from something this colour, it is full of red berry fruit, strawberry and a hint of citrus. There are also a few bright pink floral notes too.

To taste, it is almost like there is a party going on in your mouth! Lots of beautiful ripe red fruits, with some lovely yeastiness and some subtle acidity. There is a little bit of sweetness, but it certainly isn't a sweet Champagne.

This is one delicious wine, that looks absolutely stunning in the glass too. It is wonderful to enjoy on it's own, but matches perfectly with food. We enjoyed it with some maple mustard salmon that was cooked on cedar planks on the BBQ. I thought that the strong flavours in the fish might overpower the Champagne, but it had enough depth of flavour and body to complement it well.


This gorgeous Piper-Heidsieck Rosè Sauvage retails for about $54 a bottle, so it's not too expensive when you want something special for a celebration. Just look for the bright pink label.


Moet & Chandon Reserve Imperiale


This Moet & Chandon Reserve Imperiale was given to Mr eat quaff laugh by his parents after they returned from overseas. It is a duty free only Champagne. Even Mr Google doesn't seem to know anything about it and it's not on the Moet website. It must be very exclusive! All I do know is that this non-vintage is made from a combination of Chardonnay, Pinot Noir and Pinot Meunier.


We drank this wine to celebrate our 6th Wedding Anniversary. In order to include the kidlets in our celebrations, after all, they are partly the reason for our marriage, we decided to have fish and chips and Champagne. The perfect combination!


In the glass the Reserve Imperiale was a beautiful golden colour with hundreds of tiny bubbles rising to the surface of our glasses. It did look rather impressive.

On the nose, there was a combination of green apples and citrus with a delicious yeastiness, like freshly baked brioche or sweet yeast buns.

To taste, the citrus acidity is carefully balanced with luscious stone fruits and apple, with a touch of fruit sweetness.

It is a beautifully balanced Champagne with a smooth complexity. So refined and delicate.

Although we matched our bottle with salty, greasy fish and chips, it was a match made in heaven. The acidity cut through that fat beautifully. Equally, fresh prawns, scallops and oysters would be amazing to pair with this wine too.

If you happen to be travelling overseas, or have friends or family who are passing through duty free, make sure you get them to look out for this Champagne. It is certainly well worth trying,


****************************************************


With Valentine's Day coming up this weekend, make sure you look out for some Champagne and Sparkling wine bargains to surprise your loved one. Stick to your favourites, or look for something new and different. Although I have my favourite Champagnes that I return to again and again, it is nice to try something from a different producer or grower. You never know, it may become your new favourite tipple!


Thursday, 5 February 2015

Walnut And Basil Pesto With Roasted Tomato

Basil would have to be one of my all time favourite herbs. How can you possibly resist that gorgeous smell? I love it in salads, particularly with fresh tomatoes from the garden and some bocconcini, goat's cheese or feta. Delicious!

Tomato and basil just scream summer to me.

Last week I bought a massive bunch of basil for a salad I was making and had lots left over. Not wanting to waste it, I thought I'd make my second favourite basil dish - pesto. Normally I'd use toasted pinenuts in pesto, but they can get rather pricey.

A few weeks ago I saw a recipe for a basil pesto using walnuts, so thought I'd give this a go instead. In my version, I toasted the walnuts first to give them a bit more depth of flavour and nuttiness and added lots of garlic and lemon juice.


The result was delicious! I'll definitely be making my pesto this way again. Combined with the beautiful sweetness of the roasted tomatoes, this pasta dish was fantastic for an easy mid-week vegetarian meal. Alternatively, you could serve the pesto and roasted tomatoes on toasted sourdough as a bruscetta. A lovely light lunch.

Bright, fresh and tasty. What more could you want?


Basil And Walnut Pesto With Roasted Tomato


70g walnuts
3 cups basil leaves
2 cloves garlic, chopped
1/3 cup grated parmesan plus extra to serve
juice of 1 lemon
1/3 cup olive oil plus extra for drizzling
salt and pepper to taste
200g tomatoes, quartered
250g pasta

Preheat oven to 180 degrees.
Place walnuts on a baking tray and bake for 5-8 minutes, or until lightly golden. Remove from the oven and set aside to cool.
On another tray, drizzle tomatoes with oil and roast for 20 minutes or until soft. Remove from the oven and set aside.
In a small food processor, combine walnuts, basil, garlic, parmesan and lemon juice. Blitz until a course paste forms. You'll probably need to scrape down the sides to make sure everything is combined.
Add the oil and season to taste and whiz again until the desired consistency. I like mine to still be a little chunky.

Cook the pasta according to packet directions and drain, reserving about 1/2 cup of the cooking water.
Return hot pasta to the saucepan with the pesto and stir to coat. Add some of the cooking water to loosen it a little bit.
Once combined, stir through the tomatoes.
Serve in bowls with extra parmesan and a few chopped basil leaves on top.

Enjoy!


Wednesday, 4 February 2015

ASG Little Learner Pack

Even though eat quaff laugh is a food and wine blog, having two young children I'm always on the lookout for resources that can help me to be a better parent and allow my kids to learn.


At the recent Melbourne Bloggers BBQ that I went to, I was lucky enough to be asked to review ASG’s Little Learner Pack. 

ASG is focused on supporting children’s education – it’s all they do. They’re typically known for their educational funds, however this pack is an example of the educational resources they provide.

With Little Miss soon to be 6 and Mr almost 4 in tow, I jumped at the chance.


ASG are an Australian and New Zealand based, member owned organisation who provide products, information and resources to allow parents to support their children's education from kinder through to university.

They also help parents to plan for the costs of their children's education, with education benefits and scholarships available.

Being a member owned group, any financial benefits are returned to members, which in the long term helps to offset educational expenses over the years.

To find out more about ASG, visit their website here. ASG’s Little Learner Packs usually retail for $49.95 but contain over $180 worth of value.  They can be purchased directly through the ASG website.

The kids couldn't wait to get home and start looking at the pack.


Included in the pack are:

- The Cat in the Hat DVD (educational edition with 4 episodes)
- a set of five hard-cover story books based on the five foundations of You Can Do It! Education by Professor Michael E. Bernard, with stories on how to get along, confidence, resilience, being organised, and persistence
- Membership to MY ASG, including access to online education and newsletters
- Discounts on health insurance and educational DVDs
- Access to a discount on Parentingideas Club, an online parenting centre

Being school holidays when we received the pack, it was the perfect time to put it to good use. Also, the books were great to prepare Little Miss for going back to school in grade 1 and for the Little Man to start kinder.

The kids both loved the Dr Seuss DVD. Loving his books anyway, this was a real hit. The fact that the stories were educational as well, was great from my perspective. I didn't mind them spending the afternoon watching it, when I knew that they were learning something too. In fact, they loved it so much that it seemed to be on repeat for hours!

The Little Man found the books a bit old for him, but we were still able to discuss the concepts with him in a more little kid friendly way. Little Miss loved them, particularly the one called Lucy's Dream, which was about persistence. She liked the way that the books were rhyming, with big writing and pictures on each page. Learning to read herself, she wanted to try reading some of the books too. 

I have only just activated my membership to ASG, so haven't had the chance to explore them online as yet. Over the next week or so, I'll have more of a look into what I can find on the website.

I think these packs are great for anyone with young children who are just beginning their school and education journey. The DVD and books explore some great concepts and make learning fun, which is always great for the little ones. If they don't know they are learning, it's much easier to get them to do an activity!

I really would recommend the Little Learner Packs to everyone. For $49.95 they are certainly money well spent.


* Even though I was given my copy of the Little Learner pack by ASG, the photos and opinions used in this review are my own.


Monday, 2 February 2015

Lunchbox Treats

Now that school has gone back, I'm on the lookout for treats that I can put in my daughter's lunchbox. Luckily we don't have a 'no nuts' policy at our school, but I do try to avoid putting nuts in things if I can. This slice is perfect if you can't have nuts, but still want something dense and filling.

This recipe for Granola or Muesli bars was in last weeks copy of Epicure in the The Age Newspaper. I don't really like grams of wet and dry ingredients, because I find it too fiddly, but I held my tongue and diligently weighed everything out. Next time I'll take more notice of how much I add and convert it to cup measurements.  I also modified the original recipe a little bit to use up what I had in the cupboard. If you don't like dates, dried apricots, or any other dried fruit would work nicely too.  To make them as a home treat, you could easily add chopped nuts instead of the seeds.

The bars turned out nice and dense, so were great in a lunchbox, where they get tossed around a fair bit. There is nothing worse than a delicate slice or biscuits that ends up as crumbs by the time you get to eat them!

As an after school snack, kids can enjoy with a nice glass of milk and you can sit down and relax with a cup of tea or coffee!


Granola Bars

100g butter, cut into cubes
80g honey
90g brown sugar
80g dried dates, chopped
200g rolled oats
20g poppy seeds
30g sunflower seed and pepita mix
1/4 tsp allspice
A pinch of salt

Preheat oven to 160 degrees.
Line a 20x20cm cake tin with baking paper.
In a saucepan, combine butter, honey and sugar and heat until melted. Simmer gently until a soft caramel forms.
Combine all other ingredients in a bowl.
Add the hot caramel to the dry ingredients and stir to coat evenly.
Scoop the mixture into the tin and press evenly with the back of a spoon.
Bake for 15-20 mins or until golden brown. The slice will still be soft when you remove it from the oven, but will set more as it cools.
Cool in the tin, then cut into squares to serve.

Enjoy!